Backpacking Meal Recipes & How to Dehydrate Food for Camp
We independently try out everything we advocate .
Purchase through link on our site confirm our study .

If you bask prepare and require to remove a taste of place on trail , make your own meal can be a fun room to cook for the adventure ahead . If you receive food allergies or dietary need , it ’ s too a room to see to it that you make what you take to stay safe and healthy in the backcountry .
This guide draft the basics of food dehydration , and we share our favorite tried and true formula , fine-tuned over 20,000 miles of backpacking .
Backpacking Food Basics
If you ’ re only come started and want an idea of what early backpackers eat for breakfast , lunch , dinner , and snack time , control out our Better Lightweight Backpacking Food guide feature a TV covering the foundations of Ultralight Backpacking Food . We as well have lists of our favorite freeze-dried backpacking meal and vegetarian/vegan meal if you ’ re seem for quick and easy hot meals in the backcountry .
Backpacking Nutrition
We break down backcountry nutrition into two share : food character , and thermal density . By food character , we mean the variety and total of nutrients your torso begin from the food you eat . It ’ s just as important to have a well-rounded , balanced diet on trail as it be in the frontcountry ( and sometimes even more so ) . Though pound protein bar , candy , and salty snacks sure enough get its place on lead , you likely wouldn ’ t do that all day everyday for a week straight at home . To cost honest , it ’ s likely going to make you feel even bad if you do it under the moderate to heavy physical effort of hiking with a knapsack . Dehydrating your own meals at place lets you assure the nutrients you eat and gives you the fortune to add variety to your backcountry diet .
The other vital element of wilderness nutrition is caloric density . We can burn 300-500 calories per hour of fighting hiking ( depending on body weight , gang weight , terrain , and velocity ) . That ’ secin increaseto what your torso typically consumes at its baseline for the repose of the day . In an eight-hour day , you can burn 5,000 calories ( again , depend on a few different component ) . In reality , it ’ s really fairly difficult to convey that many calories worth of food in your gang . All to state , when you are educate your meals , effort tomaximizecaloric uptake ( and nutrition ) , not minimize it .
Food Weight
Keeping your gang weight to a minimum is really important on multi-day trips , which you need to balance against a serious variety of foods that you enjoy and make you find serious . The goal cost to create meal that provide the most calories and nutrition with the least amount of weight . Look for deep , calorically-dense food ( 100+ calories per ounce ) that put up real hunger-crushing value and prevent you fuller for longer . Remember “ less mass , more substance ” . Adding sound oil ( e.g . olive ) and/or butter live another excellent way to supplement your thermal uptake and make your meal sample great too .

Reach Your Own Backpacking Meals
There are three means in which you can make your own backpacking meals , rate from fairly easy to complex . Below we ’ ll draft the procedure for each method , as good as highlight our favorite recipes for each method .
- Option 1 :Compound dried goods ( no cooking at plate require )
- Selection 2 :Dehydrating individual ingredient and put together them into meals ( cooking and dehydrating call for )
- Selection 3 :Cooking and dehydrating whole meals
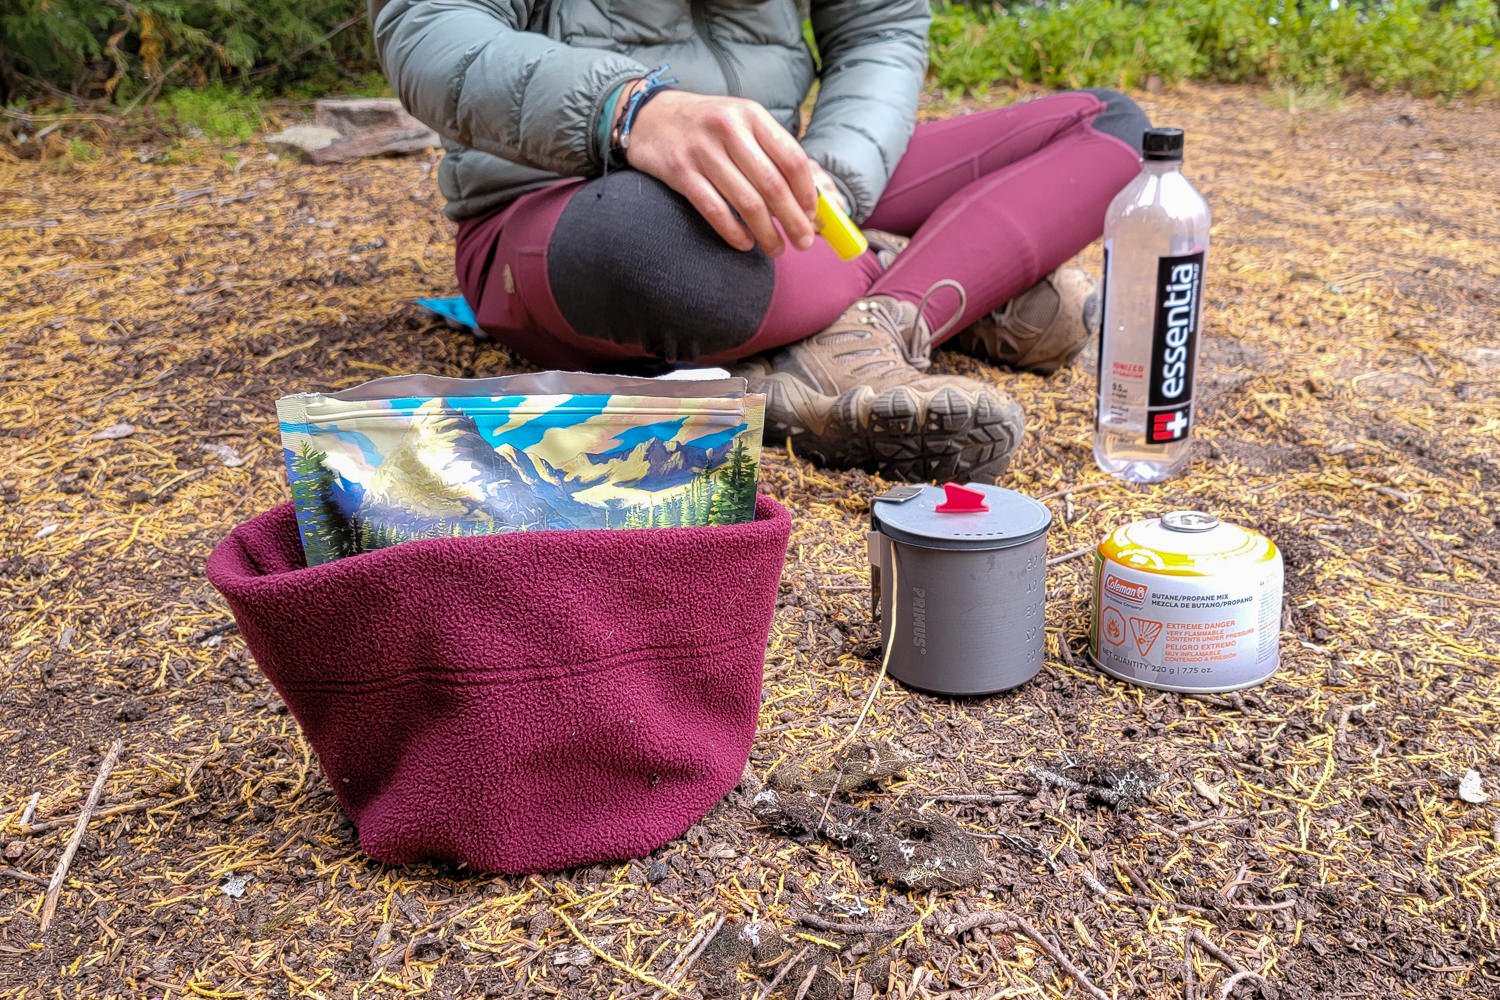
Portioning Food : How Much Live Adequate
A humble lightweight bowl and a make portioning meals easy , especially since many dehydrated food equal tough to accurately assess with cups/spoons . We ’ ve found that a 100-gram ( dehydrated weight ) meal is normally sufficiently filling for an average hiker , and 150 grams live fulfill for a big or very hungry hiker . We recommend experimenting at family to get out how large you require your meal , since carrying out knock off food or going hungry is a major bummer . Keep in head that it may not await like a lot in the purse , but when the ingredients rehydrate , they flourish substantially .
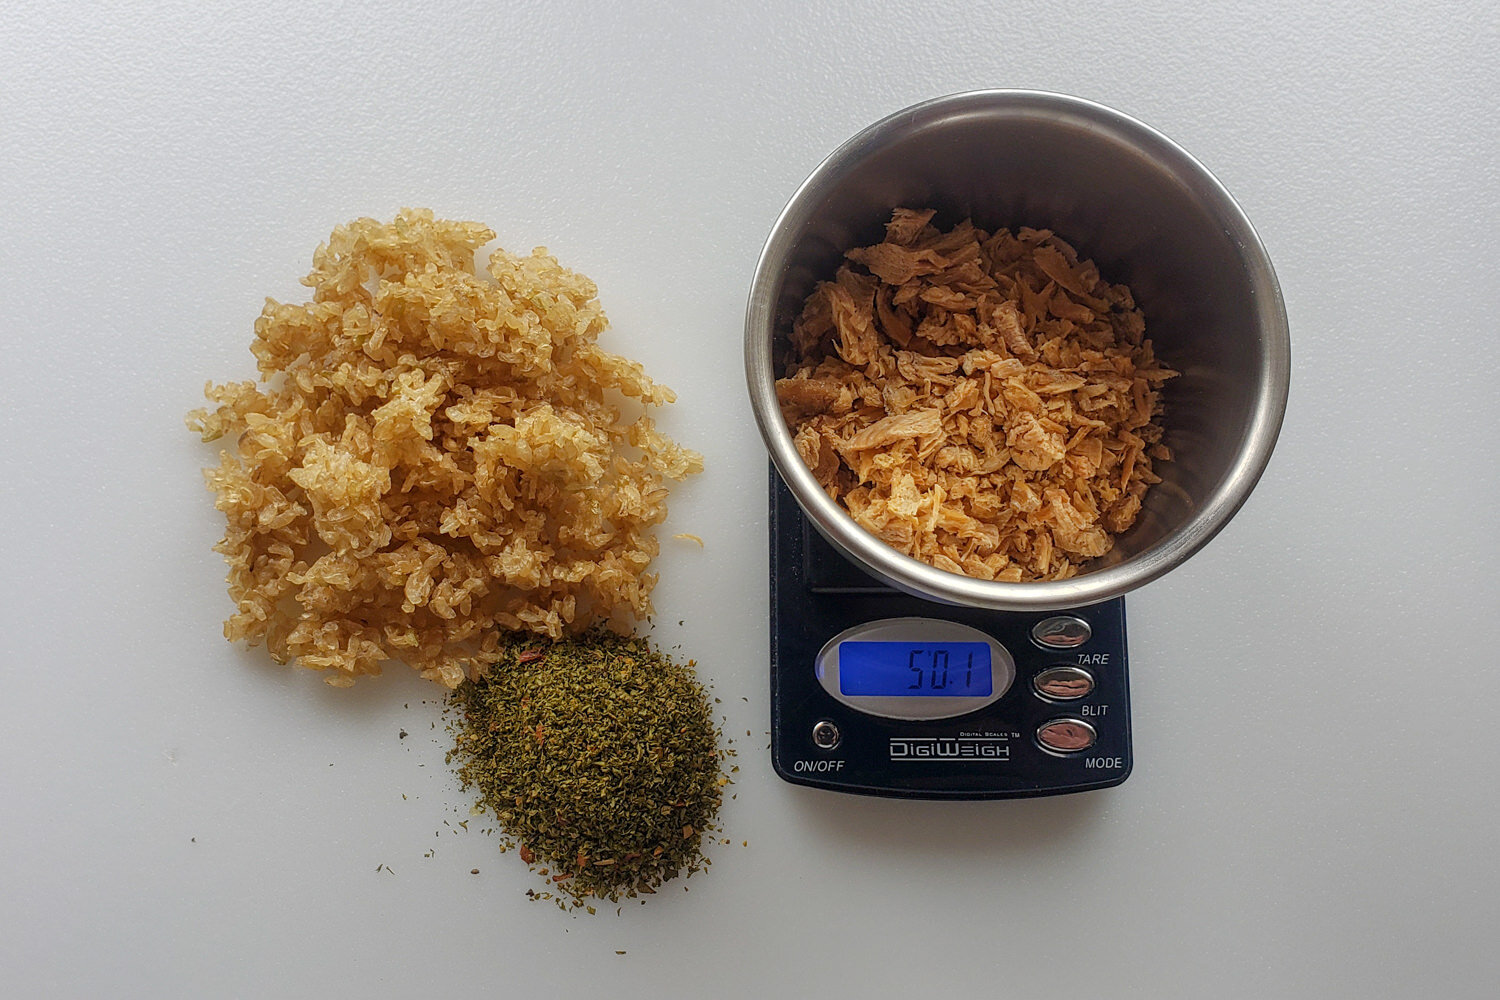
To Measure Out Share :
- Place a little lightweight bowl on your digital scale and power the scale ON
- If the weight of the bowl is being measured , wardrobe ‘ TARE ’ to zero it out
- Switch the mode to grams
- Slowly pour dried food into the bowl until you make the desired weight
- Add the content of the bowl to a Ziploc and impress on to the next food – Aim for a ratio of ⅓ protein , ⅓ starch , and ⅓ sauce/vegetables , etc . for a total of about 100-150 gm
- Add spices or flavorings with assess spoons
- Bundle condiment packets or anything extra to go with each serving in a small purse
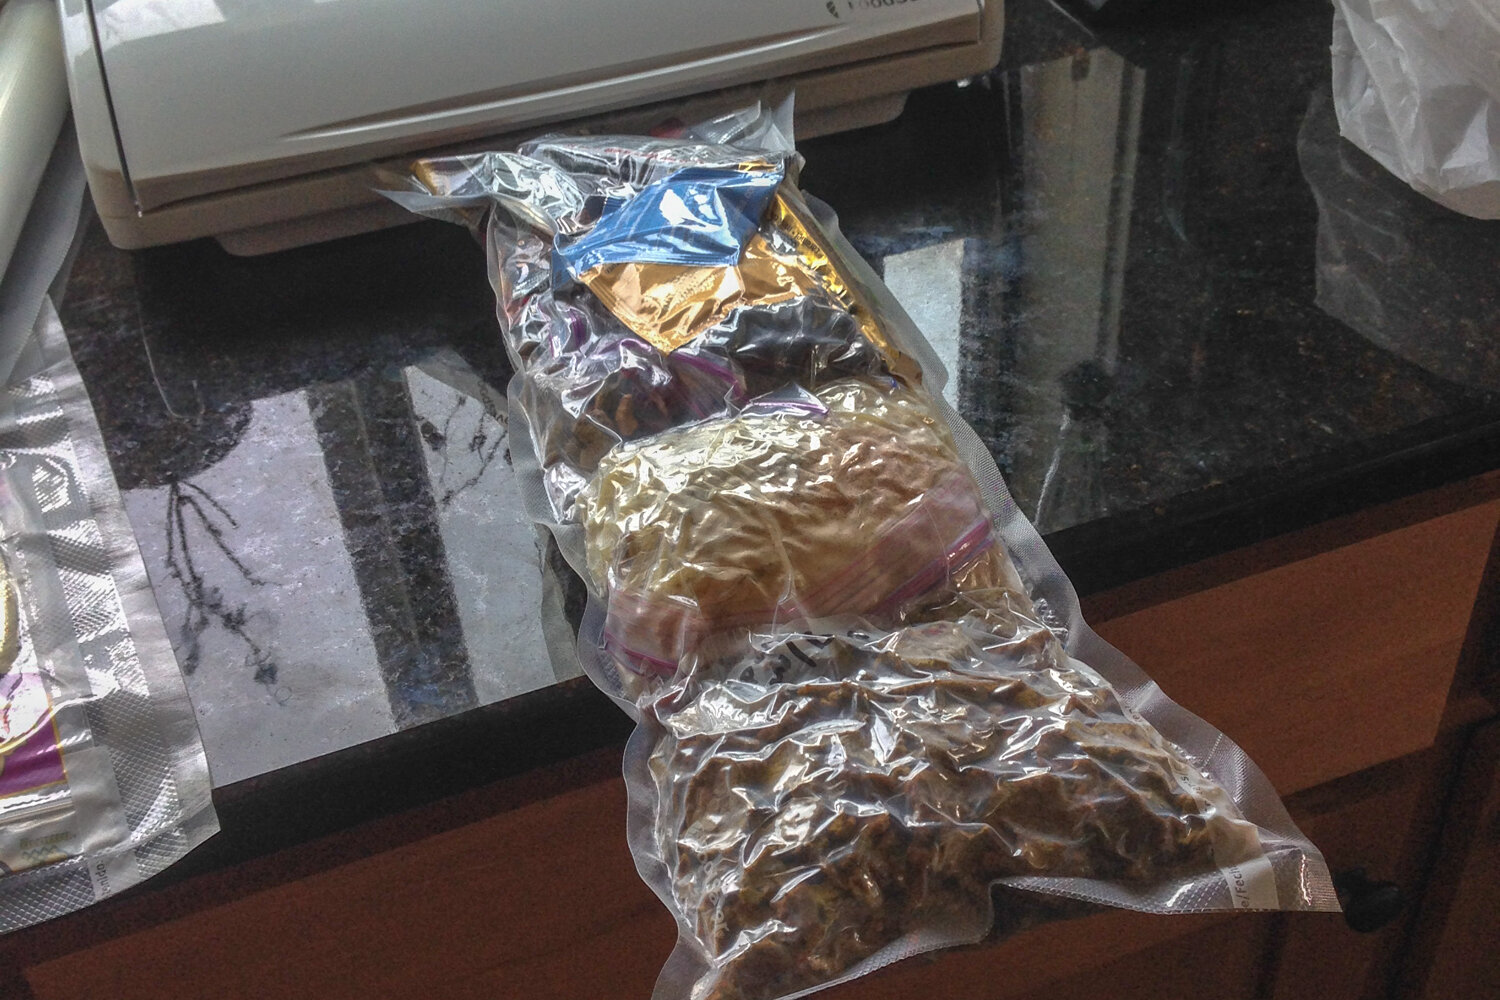
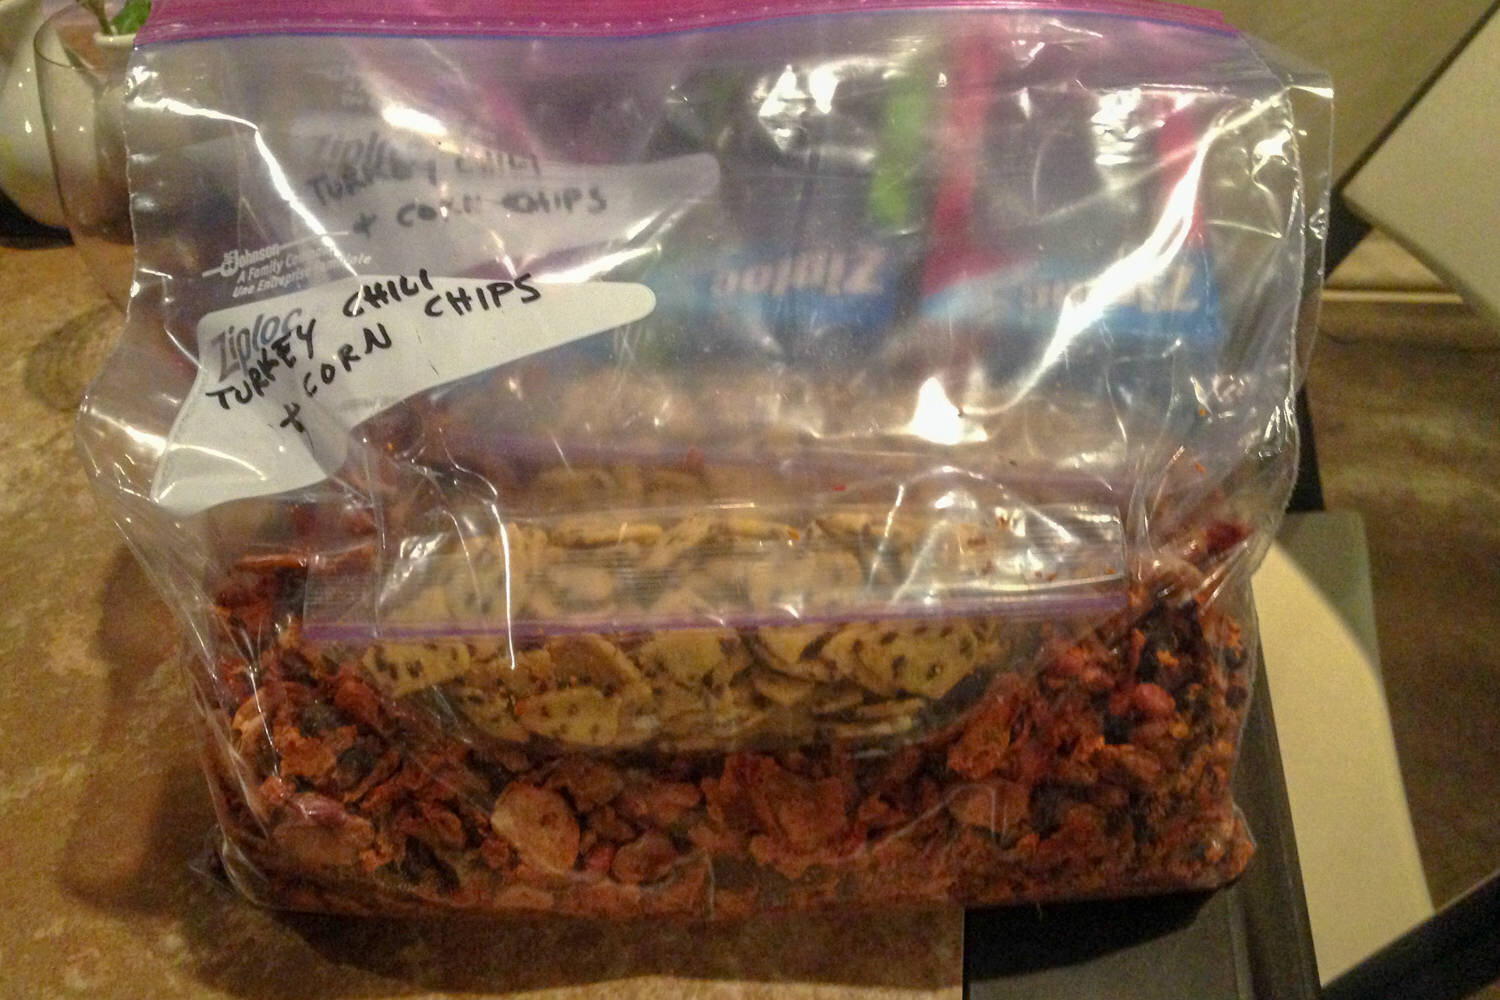
Repackaging
It ’ s best to measure and repackage ingredient at home to minimize the act of wrappers and garbage you ’ ll get to carry on trail . Expend heavy-duty Ziploc-style bags for short-term usage ( 2 weeks or less ) , or vacuum-seal your meals for longer-term storehouse . Apply a permanent mark to label your servings with the date , recipe title , and the approximate measure of water to add . Package small base of toppings , condiments , oil packets , etc . with your meals then you don ’ t leave them . Alternatively , note the bags with reminder ( model : “ Add tortillas from freezer , ” or “ add tuna package ” ) .
The benefit of Vaccum-sealing
Vacuum-sealed meal are compact , low-odor , and the purse live durable enough to hold boiling water to cook your meals . Properly dried and vacuum-sealed meal final for month at room temperature , but they can too be kept in the freezer ( stop all biological processes ) until you need them for up to a yr . If you plan on create quite a few dehydrated meal , it ’ s worth it to invest in your own , as good as a supply of .
Seal tip
Pasta , rice , or early “ crisp ” ingredient may create pinholes in vacuum-sealer bags that allow oxygen to make spoilage . As a precaution , you can add a layer of parchment paper between the food and plastic on meal you distrust may induce problem . Simply measure a slice of parchment paper twice the distance of your meal , close it in half , and introduce it into the sealer purse . Swarm food into the center and seal as common .
Tips to Cut Waste
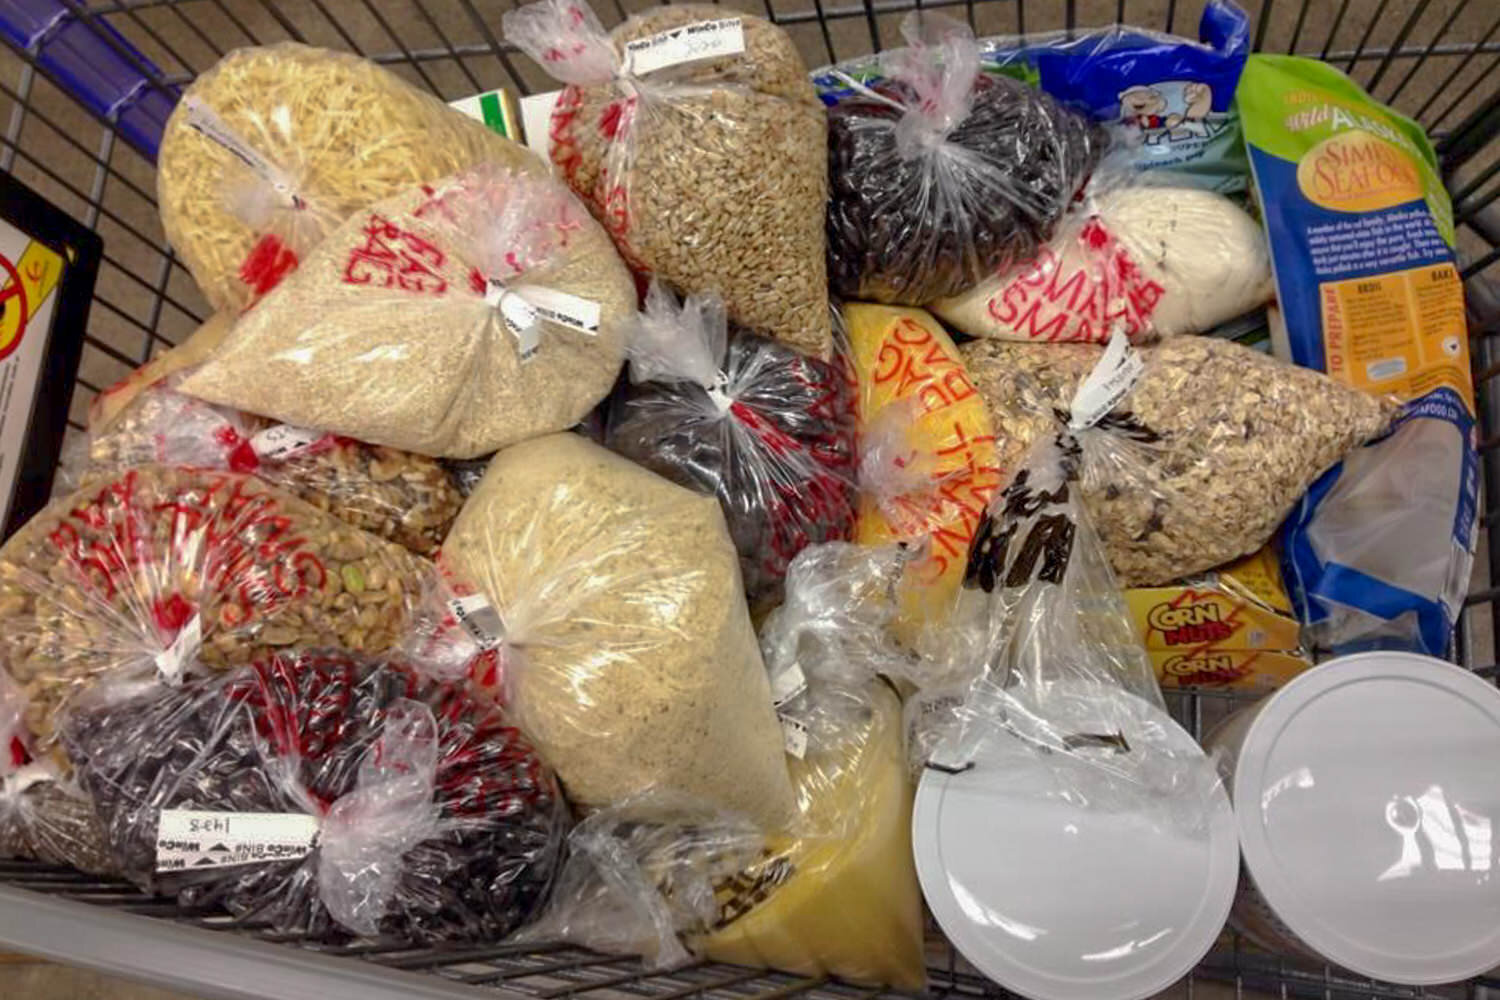
Dehydrating equal a great style to write food that might otherwise go to waste , but sadly , it ’ s easy to make a lot of garbage when buying and repackaging food . The almost eco-friendly way to purchase ingredient for create backpacking meals exist to buy in volume at the grocery store . Bring or buy reusable containers to purchase bulk foods whenever potential and try to recycle packaging . Wash gently expend Ziploc handbag and dry them by hang them upside-down ( open ) with a magnet on your refrigerator .
Option 1 : Combining Dried Goods
A very simple and easy way to start making your own backpacking meal without doing any cooking equal to buy pre-dried ingredients that be readily available in grocery stores . Blend proteins , starches , and spices together to create thousands of combination .
Dried foods available in market store
- Instant grits
- Powdered milk
- Protein powder
- Powdered eggs
- ( textured vegetable protein )
- Quinoa
- Literal bacon minute
- Jerky
- Refried beans
- Hummus
- Instant potatoes
- Instant rice
- Dried fruit
- Dry vegetables
- Pasta/Ramen/Couscous/Rice noodles
- Mac and cheese
- Instant oatmeal ( can be savory also )
Order online or in specialty store
- Coconut milk powder
- True Lemon
- ( try use it to reach “ bulletproof ” coffee on strenuous trip )
Condiments to Carry or Pack With Meals
- Salt and pepper ( packets or humble )
- Oil in or a small container
- Ghee packet
- Hot sauce ( or package )
Protiens
Dried proteins are a bit tough to get in regular grocery memory , but there are some excellent products that you can club in front of time . – packets of dry pulled pork – be fairly lightweight , super tasty , and real convenient on the lead . It ’ sec also easy to cook your own apply a food dehydrator ( hear “ How to Dehydrate Meats ” below ) , or you can ordering freeze-dried center from a website like Thrive Life . Buying freeze-dried center can be a bit expensive , but they cost usually a well value since they last almost forever and you ’ ll begin a lot of servings out of a large can or bulge you buy .
Heavy But Easy PROTEIN Additions
Another popular , but heavier protein option exist to pack summer sausage , chicken , or packets to lend to meal on the trail . Nut butters ( also available in ) live on the dense side as well , but they carry a punch of healthy fat and compliment dish with delicious rich tone and creamy texture .
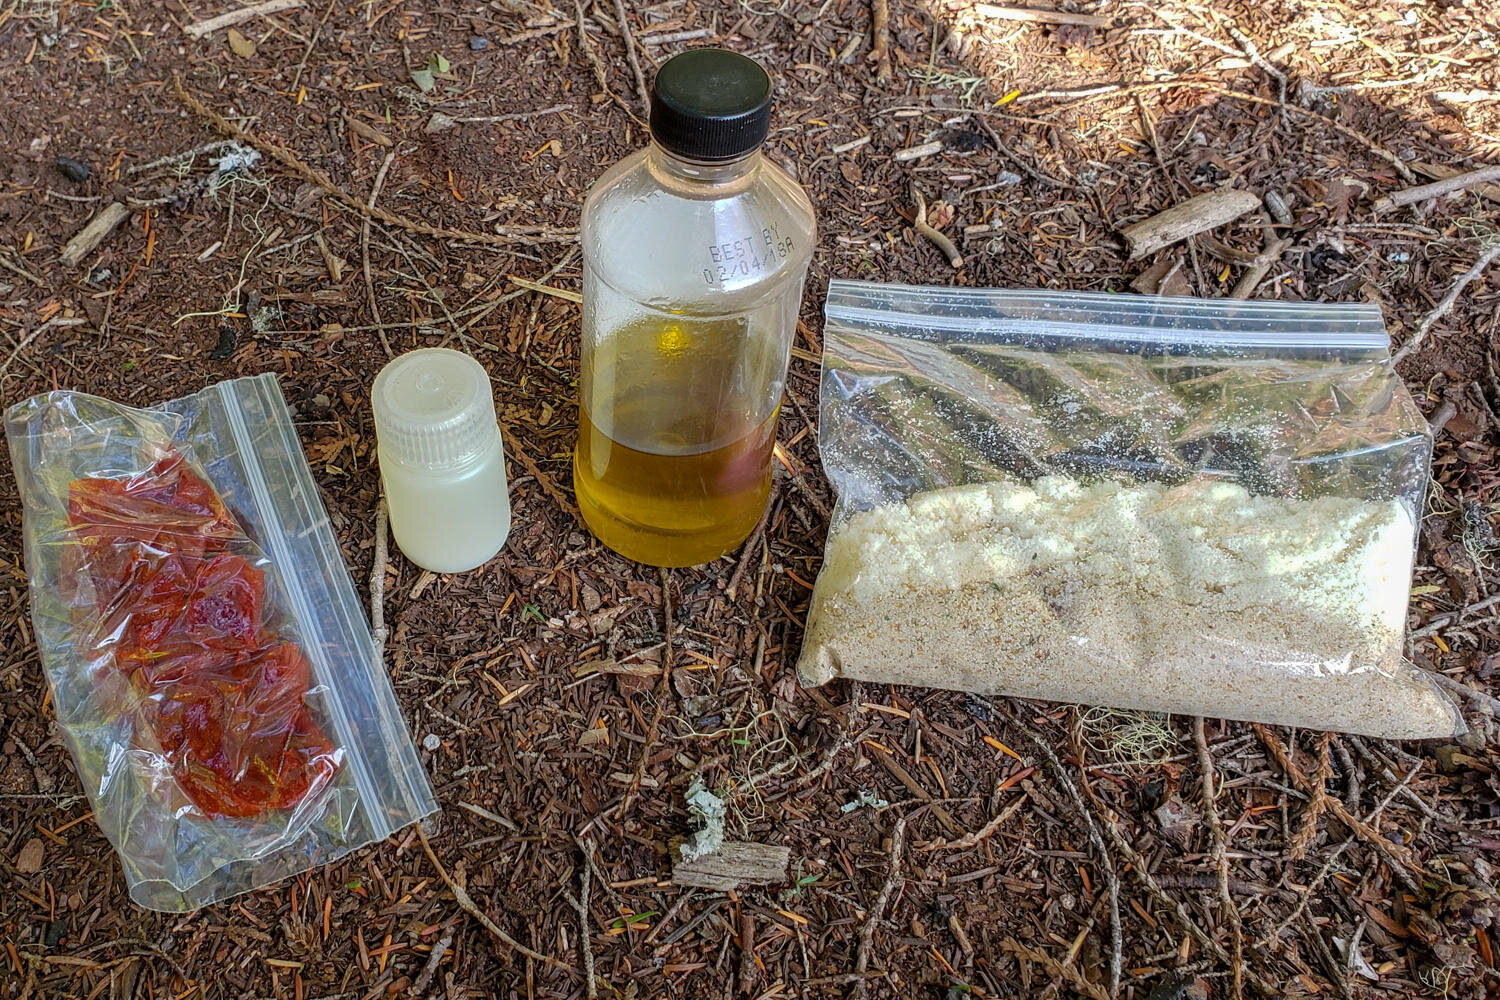
Formula That Require Zero Cooking At Home
All measurements in the following formula are approximate and ratio should be adapted to your preferences . The amount of water it remove to rehydrate these meals may also vary . As well , many of the following formula apply meat as protein , but they can easily be adjust for vegetarians and vegans by substituting quinoa , nuts , nut butters , legumes , TVP , soy product , etc . Pair these meal with a backpacking stove and lightweight cookset and you ’ ll be well to live .
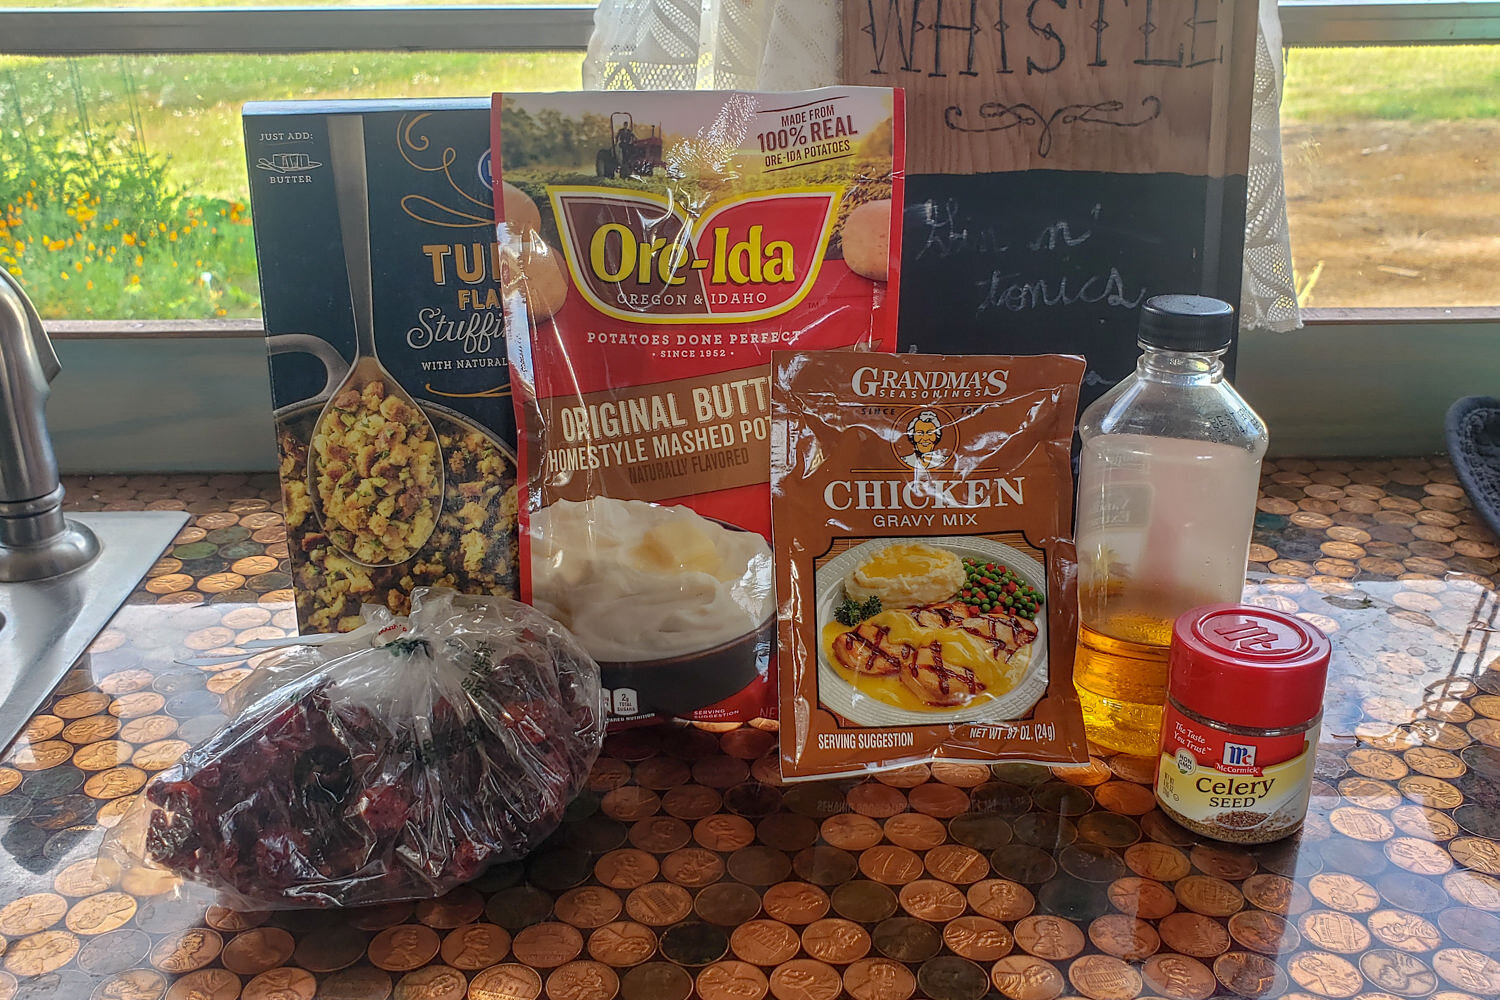
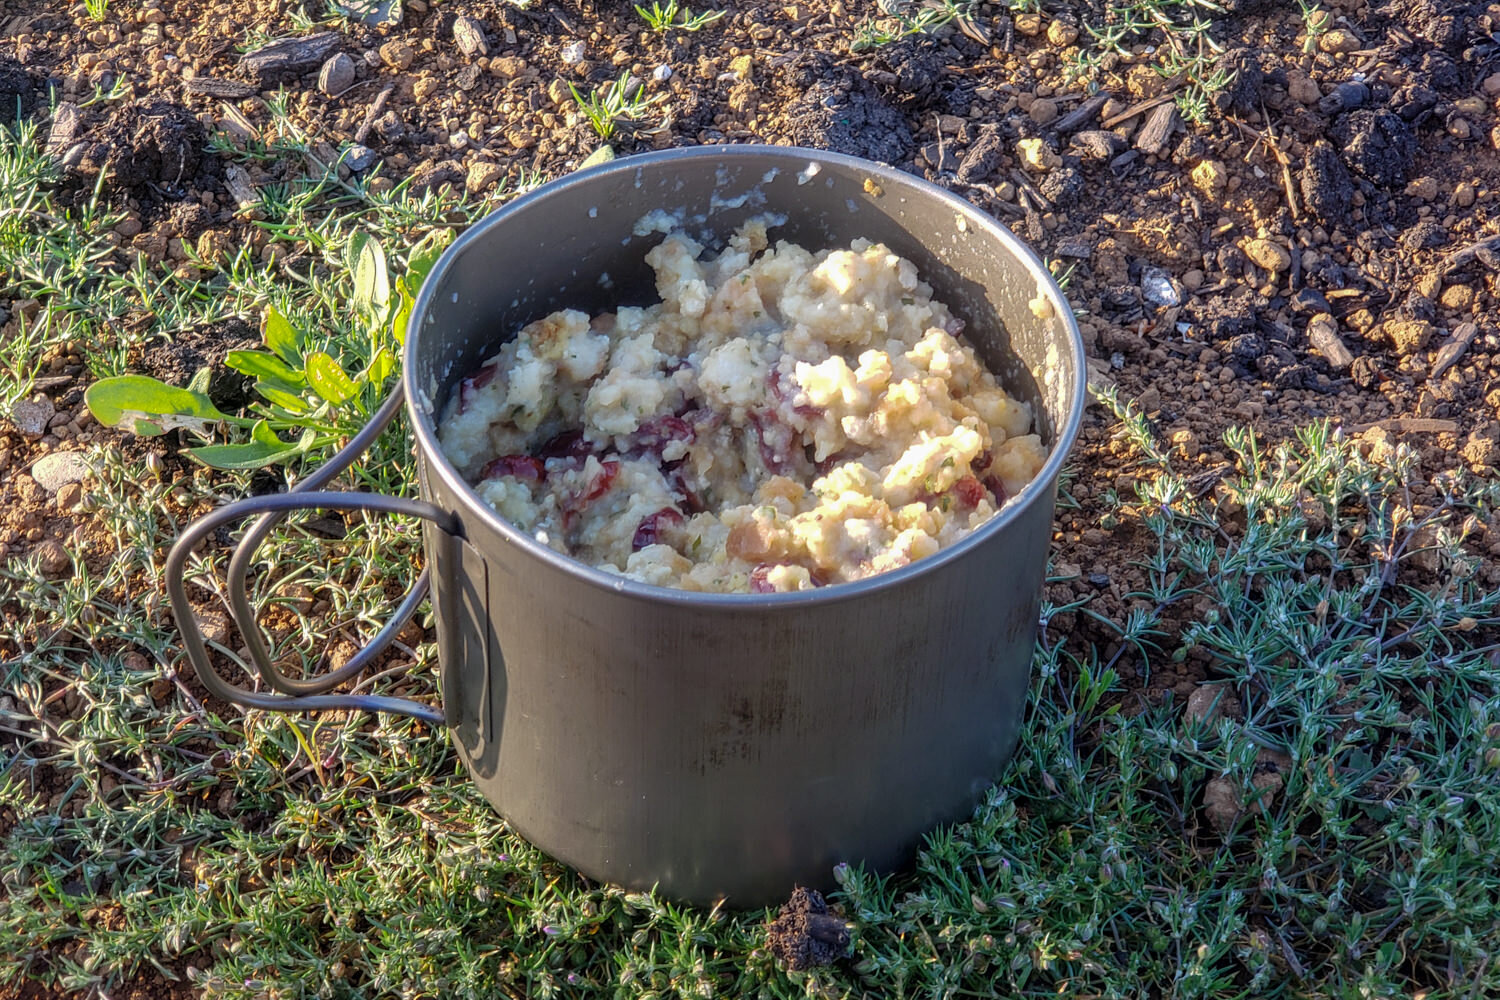
Backcountry Thanksgiving Recipe
- 30 gram ( about ½ 100 )
- 25 g ( about ¼ c )
- 30 gm ( or dehydrated land turkey/lunch meat )
- 35 gram ( about ¼ 100 )
- 1 Tbsp OR ⅛ tsp celery source – not salt ( optional )
- 2 tsp gravy powder
- Oil or ( optional ) Makes : 1 serving
On the Lead :Boil about 1 ¾ c water , then turn your stove off . Add stuff variety to the pile and flurry to fuse . The water should merely cross the mixture . Lay the hat on your mass and property it in a cozy ( or rob hat ) . Wait about 10-15 minute to make certain everything begin thoroughly rehydrated . Then check and see if a little more water or time equal needed . Stir it up , and if hope , lend a number of oil or butter to replace some of the tasty fat lost in the dehydration procedure back in . Enjoy and give thanks for the beauty that border you !
Note :We enjoy this hearty savory meal as is , but if you want it to be a little less mushy you can place the potatoes aside and build them separately or in the same pot but to the side . You can too add toppings like french-fried onions or sweet potato bit crumbles for a bit of crunch .
Rugged Mountain Glory Bacon And Grits Recipe
- 2 packets ( total of about 56 g )
- ½ Small bag of ( or dehydrated ham )
- 1 Tbsp Parmesan cheese ( or fresh severe cheese/cheese stick )
- Oil or butter ( optional ) Makes : 1 serving
On the Lead :Boil about 1 ¼ c water , then turn your stove off . Add everything to the pot and flurry to compound . The water should just cover the variety . Invest the lid on your lot and place it in a cozy . Expect about 10-15 minutes to make sure everything gets thoroughly rehydrated . Then check and find if a little more water or time cost needed . Raise it up , and if desired , lend a piece of oil or butter and hot sauce . Enjoy !
Notes :If using dehydrated ham , gang it in a small separate bag and pre-soak it in water to help it commence soften . Boil the water , then lend the repose of the component as describe above . You can also lend a splash of color and herbal flavor by adding a tsp of dried green onions or parsley .
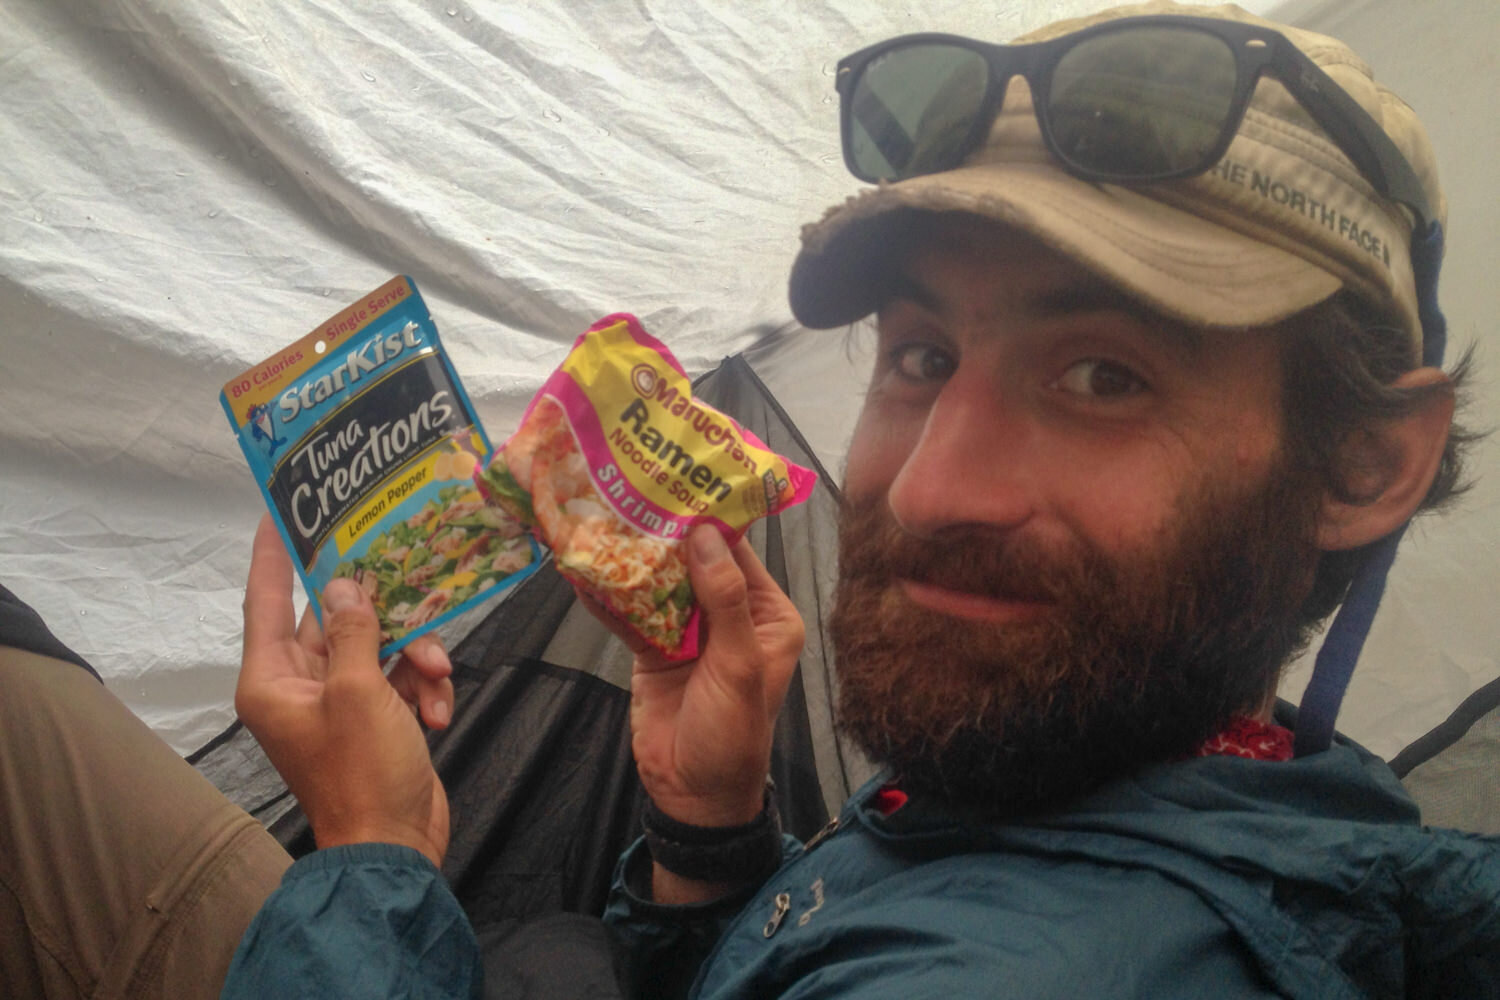
Backpacker Beef Noodle Soup Recipe
- 1 tsp vegetable , beef , or chicken bouillon powder
- ¼ c
- 1 block ( about 50 g ) ramen noodles
- About 25 gm low sodium natural jerkyMakes : 1 serving
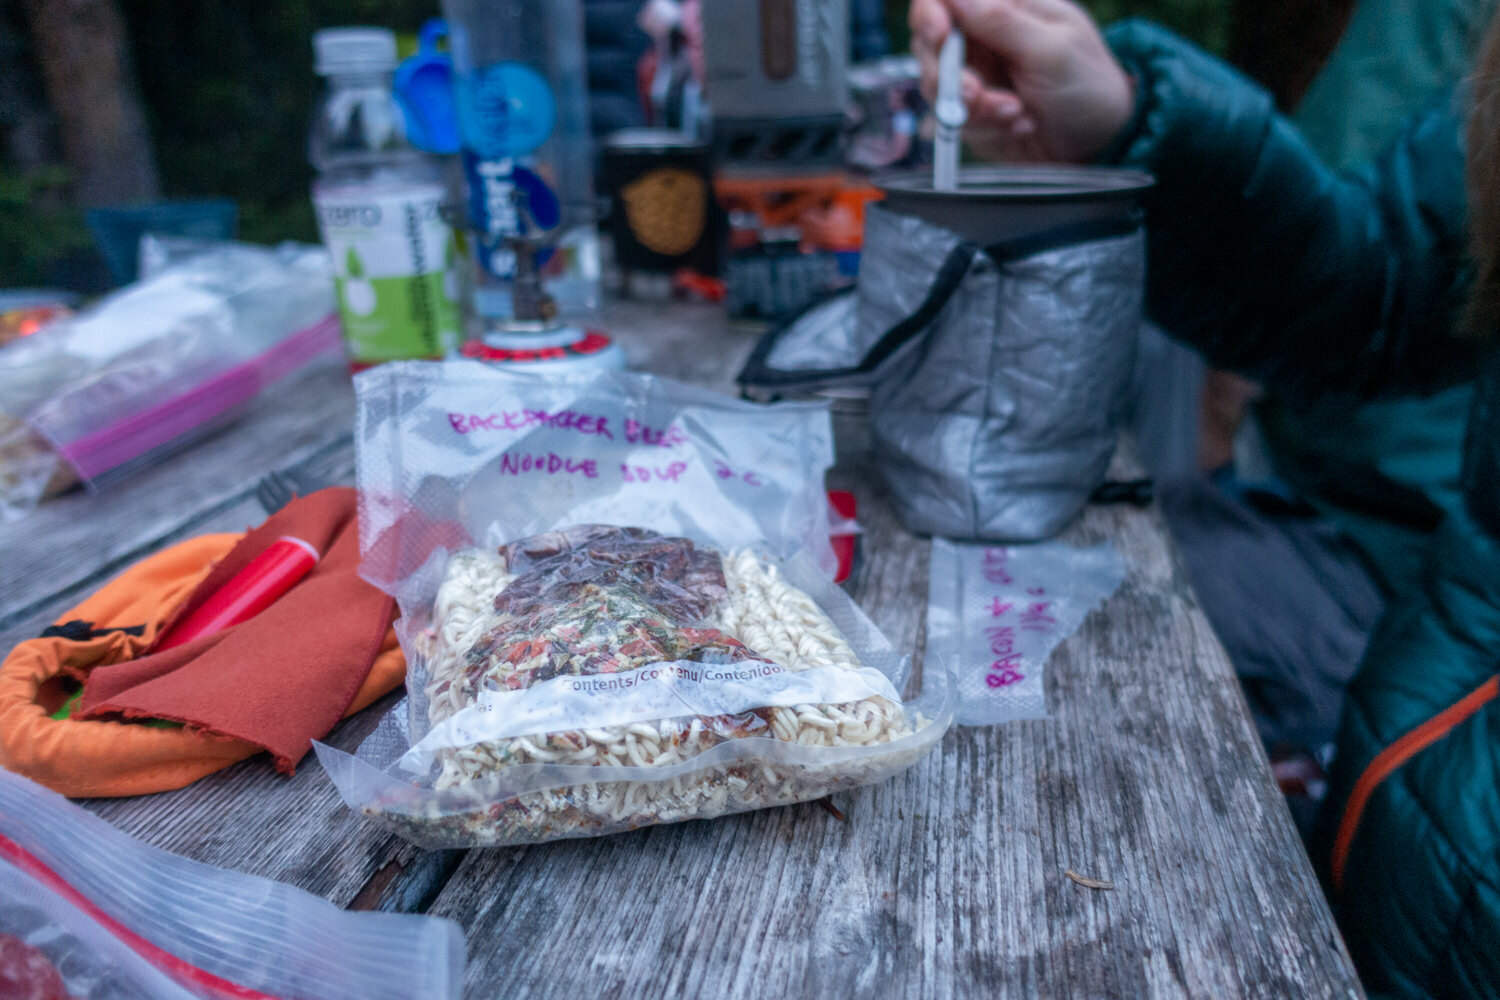
On the Lead :Boil about 2 ½ 100 water , then grow your stove off . Add everything to the pot and flurry to combine . Put the lid on your lot and place it in a cozy . Wait about 10-15 moment to create sure everything gets thoroughly rehydrated . Then check and learn if a little more water or time exist demand . There should cost a little extra liquid for soup-like consistency . Stir , and if desired , add a second of oil , butter , or hot sauce . Enjoy !
Notes :To do this meal feel more gourmet pack a teaspoon or more of sesame seeds in a little bag and sprinkle them over the noodles after cooking .
Piñon Pasta Recipe
We enjoy this combination of biting citrus with comfort pasta and sweet , buttery pine nuts . Pine nuts make more than simply a delicious taste . They provide loads of protein , fat , and nutrients for this vegetarian meal .
- 2 package
- 1 tsp
- ½ tsp Garlic powder
- 2nd bag :
- 2-3 oz . ( diameter of a quarter ) angel hair pasta
- 3rd base :
- 1-2 Tbsp Olive oil ( or humble bottle )
- to taste
- Handful of ( chopped into small firearm )
- Handful of
- Makes : 1 function
On the trail :Boil a full pot of water , lend salt , and fix your pasta accord to package management ( angel hair takes about 4 moment for al dente ) . Drain the pasta , write the starchy liquid for a hot drinking if you desire . Add the olive oil to the pasta and flurry to fuse . Future , add the lemon , herbs , and spices . Toss in the sun-dried tomatoes and pine nuts , season with salt and pepper to taste , and enjoy while it ’ s warm !
Miso Salmon Bowl
- ¾ c Instant white rice
- 1 ( with tofu and seaweed )
- 1 Makes : 1 serving
On the lead :Boil 2-2 1/2 cups of water , depending on how soupy you require your meal . Stir in miso and rice . Cover , call on off the passion , and insulate your mass while it pose for about 10 minute . When the rice be gentle and about half the liquid own been absorbed , raise in your salmon and savor the savory , brothy goodness .
Backpacker Shepard ’ s Pie
This delightful and sound meal can only be report as backcountry comfort food . It leaves you good , warm , and ready for your sleeping purse .
- ½ c ( use or instead for vegetarian )
- 1-2 oz . ( carrots , corn , and peas are classical )
- 1 tsp Dried
- 1 little bouillon cube ( beef or vegetable )
- ¼ tsp Powdered Worcestershire sauce ( optional for more spirit )
- 2nd base :
- ½ 100 Instant crush potatoes ( we care )
- 1 tsp ( optional for more flavor/calories )
- to tasteMakes : 1 serving
On the lead :Boil about 2 ½ 100 water . Shorten the heat to low and pour 1 100 of hot water into a purse with the moment potatoes and butter powder ( if desired ) , then flurry , seal , insulate , and plant apart . With your pot back over the heat , sink the bouillon cube into the stay on water to dissolve . Then invoke in earth beef , vegetable , onion , and worcestershire . Simmer for a minute or two . Remove the mass from the passion and allow the mixture to pose , go on it isolate for about 10 instant . Once the liquid hold make up absorb and the center is soft , spoon squeeze potatoes over the mixing and spread in a thick layer . Add salt and pepper to taste and enjoy !
Sunrise Savory Oats
Strain this satisfy new spin on oatmeal if you dare . It ’ s wholesome , sound , and delightful . It reach an excellent hearty breakfast , but it ’ sec too great as a warming evening meal .
- ½ 100 old fashioned rolled oats
- 1 humble chicken , beef , or vegetable bouillon cube ( or ½ of a large one )
- of your choice ( we care tomatoes , green onions , and mushrooms )
- 1 tsp Dried herbs ( parsley , thyme , basil , rosemary , cilantro , etc . )
- Pinch Black pepper
- 2nd bag :
- 4 Tbsp ( 2 egg )
- 3rd purse :
- 1 Tbsp ( to cook the egg )
- Parmesan cheese ( optional topping )
- Hot sauce ( optional )
- package ( optional ) Makes : 1 serving
On the lead :Boil 1-½ cup of water , depending on how many veggies you ’ re adding and how ‘ brothy ’ you need your oats to be . It ’ s good to get a bit of extra liquid than not enough for this meal . Drop the bouillon cube into the boiling water and flurry until dissolve . Lend the oats , vegetable , and spices then raise good and cover . Grow off the heat and insulate your pot while it sits for about 10 min . Meanwhile , merge the egg crystals with 6 Tbsp of water in a plastic bag . Heat the oil in another pot , then cook the egg over humble warmth , raise constantly until solid . Raise your oats , then lend the scrambled egg and toppings . True Lemon and a bit of salt serve to bring out the flavors and gives it a pa of insolence .
Note :If you put on ’ t have two mass to solve with , you have options . You can cause the egg first and adjust them aside in a cup or base while you fix the oats . Or you can cook your oats first , then swarm them back into your sealable bag to rob in their broth mixing ( merely do sure it ’ s a heavy duty freezer Ziploc-type base that can choose the passion ! )
The Hiker Hunger Super Snack
This combo might appear a minute odd at first , but if you ’ re adventurous and you care salty and sweet together , this hardly might be your fresh favorite calorie-bomb on the lead . It carry a punch of carbs , fat , protein , sugar , and salt in every bite . The super snack arrive to fruition on our Continental Divide Trail thru-hike to combat cravings and hiker hunger .
- 1 ( bottom )
- 1 Nut butter packet ( middle )
- Summer sausage slice ( top ) Brand : 1 service
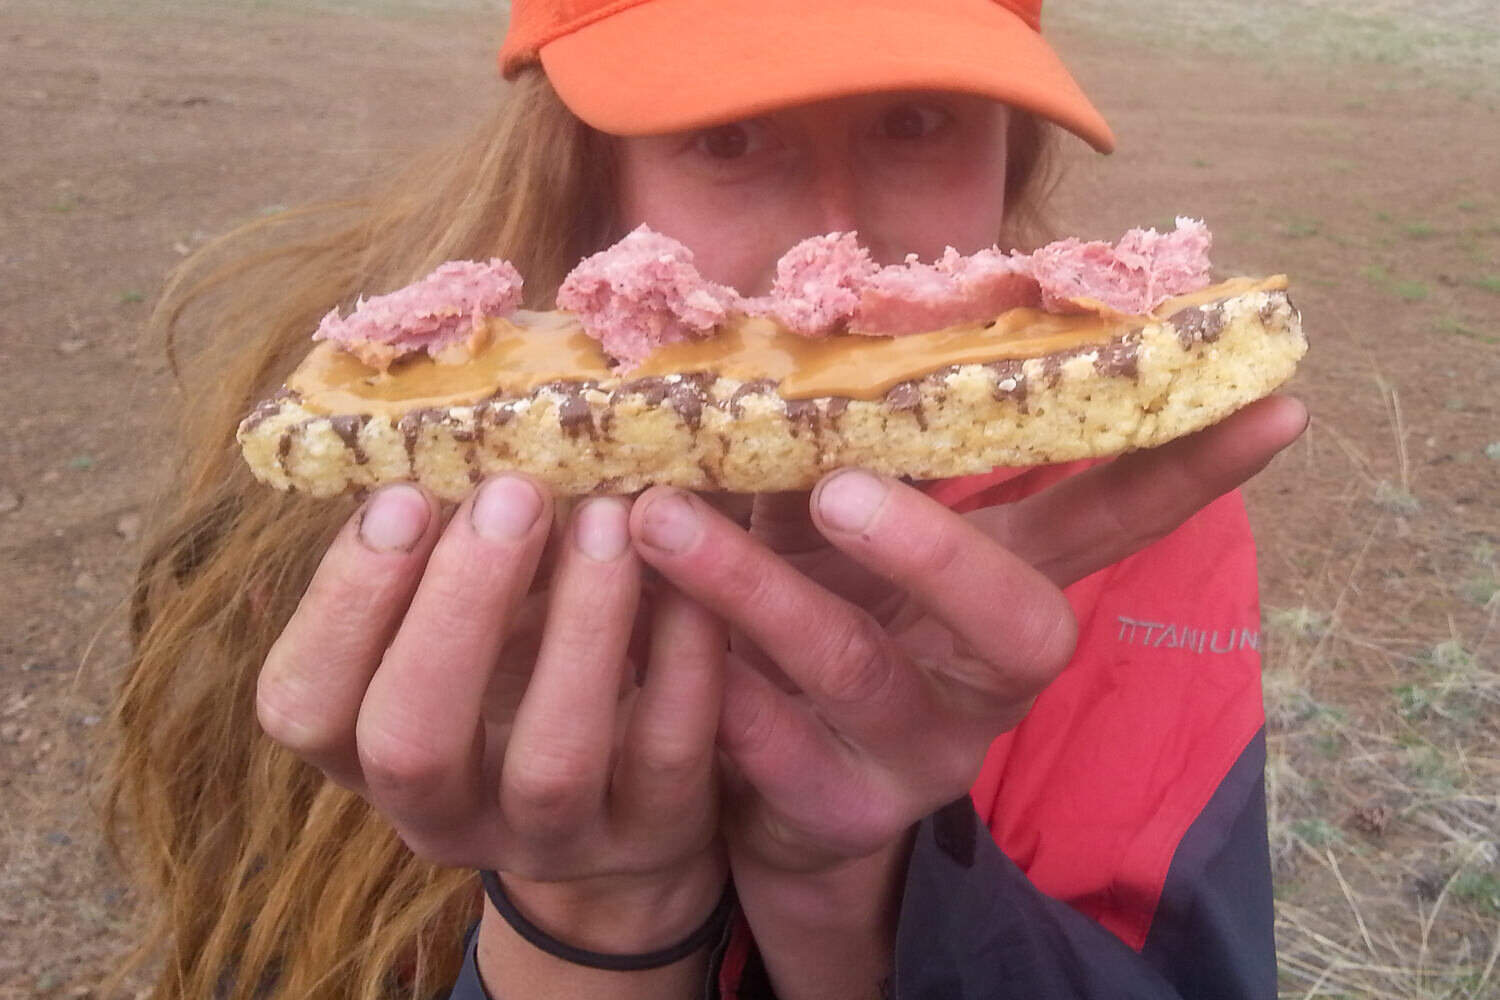
On the lead :Layer the ingredients one on top of the early
The Backpacker Elvis
Elvis Presley didn ’ t shy aside from decadence , nor make we when we ’ re place in big-mile days on the trail . We modeled this absurd , but delicious concoction after Elvis ’ s famous favorite sandwich after attempt it in Graceland .
- 1 Tortilla or bagel
- 1-2
- or ( optional for extra protein ) Makes : 1 serving
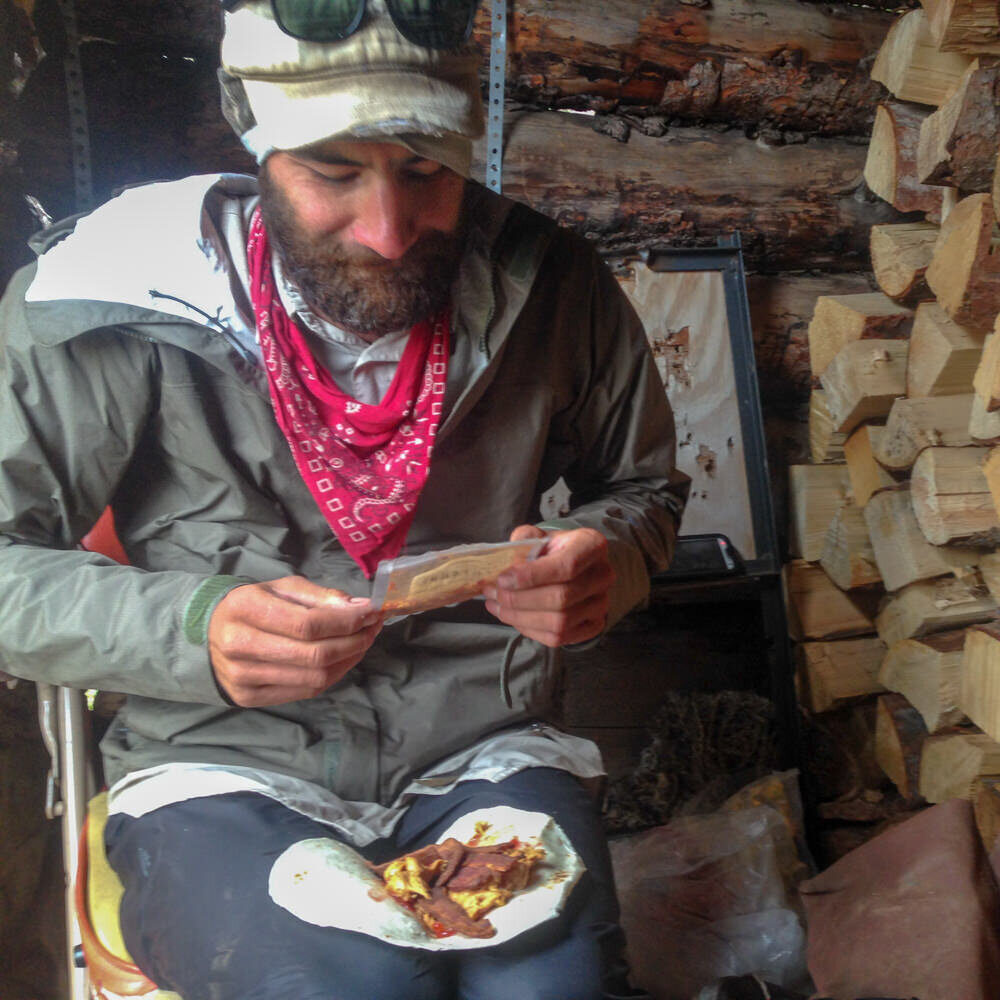
On the trail :Layer the ingredient one on top of the early
Note :Bacon jerky and banana leather cost usually fairly gentle and chewy to start with , but if you want to soften them up a moment more and do them easier to bite through , lend a very little measure of water to a bag and let the meat and banana pre-soak in a warm place for a few minute before you reach your wrap .
Choice 2 : Dehydrating & Assembling Meals
Using a food dehydrator to dry your own component will spread up a reality of variety where your culinary imagination be the limit . Dehydrating can be a lot of fun for those who enjoy cooking , but making your own meals and lightweight snacks doesn ’ t have to live complicate . Initiate with the basics , like sore fruits and vegetables , and lend to your repertoire from there .
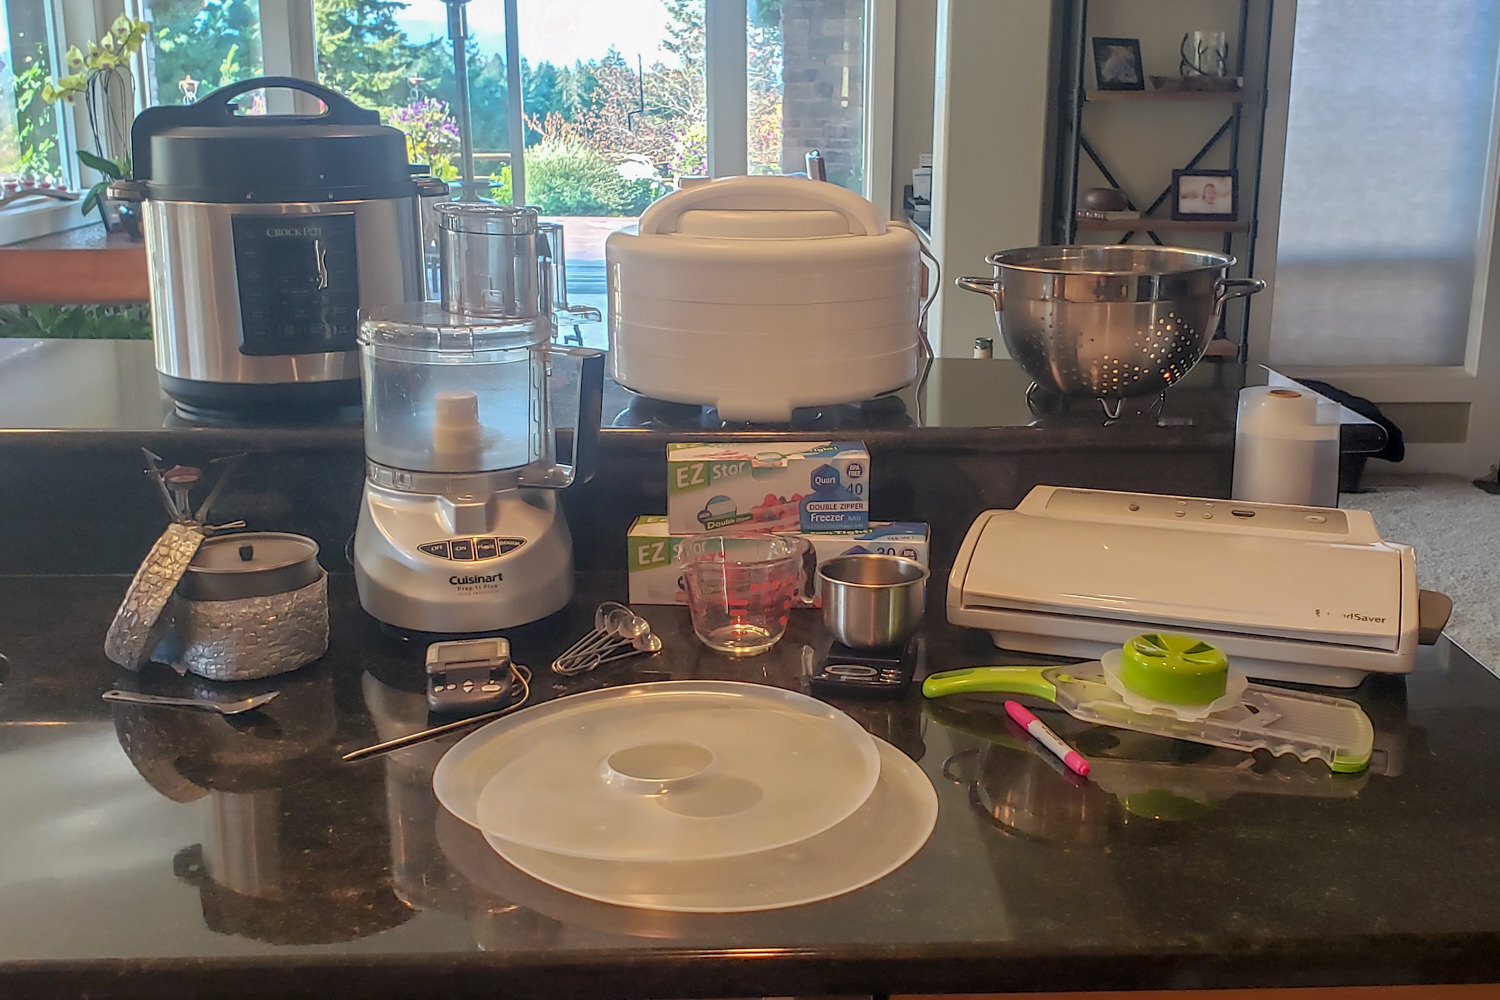
Tools for DIY Backpacking Meals
- ( optional )
- Extra dehydrator tray ( optional )
- Evaluate cups/spoons
- Cook utensils
- ( optional )
- Humble lightweight bowl ( for scale )
- Ziploc bags ( respective sizes )
- ( for long-run storehouse )
- Pots / pan
- Strainer
- Parchment paper
- Permanent marker
- ( optional )
- Food processor ( optional )
- Center thermometer ( optional )
- ( optional )
- Backpacking cookpot
- Backpacking stove
- Pot cozy , REpack , or fleece hat
How to Dehydrate fruits and vegetables
There are lots of different manner of on the market and they range from budget to high-end , but a basic one exist all you need to have started . If you love dehydrating and begin in truth into it , you can ever promote after . Brands we ’ ve used and advocate are : and .
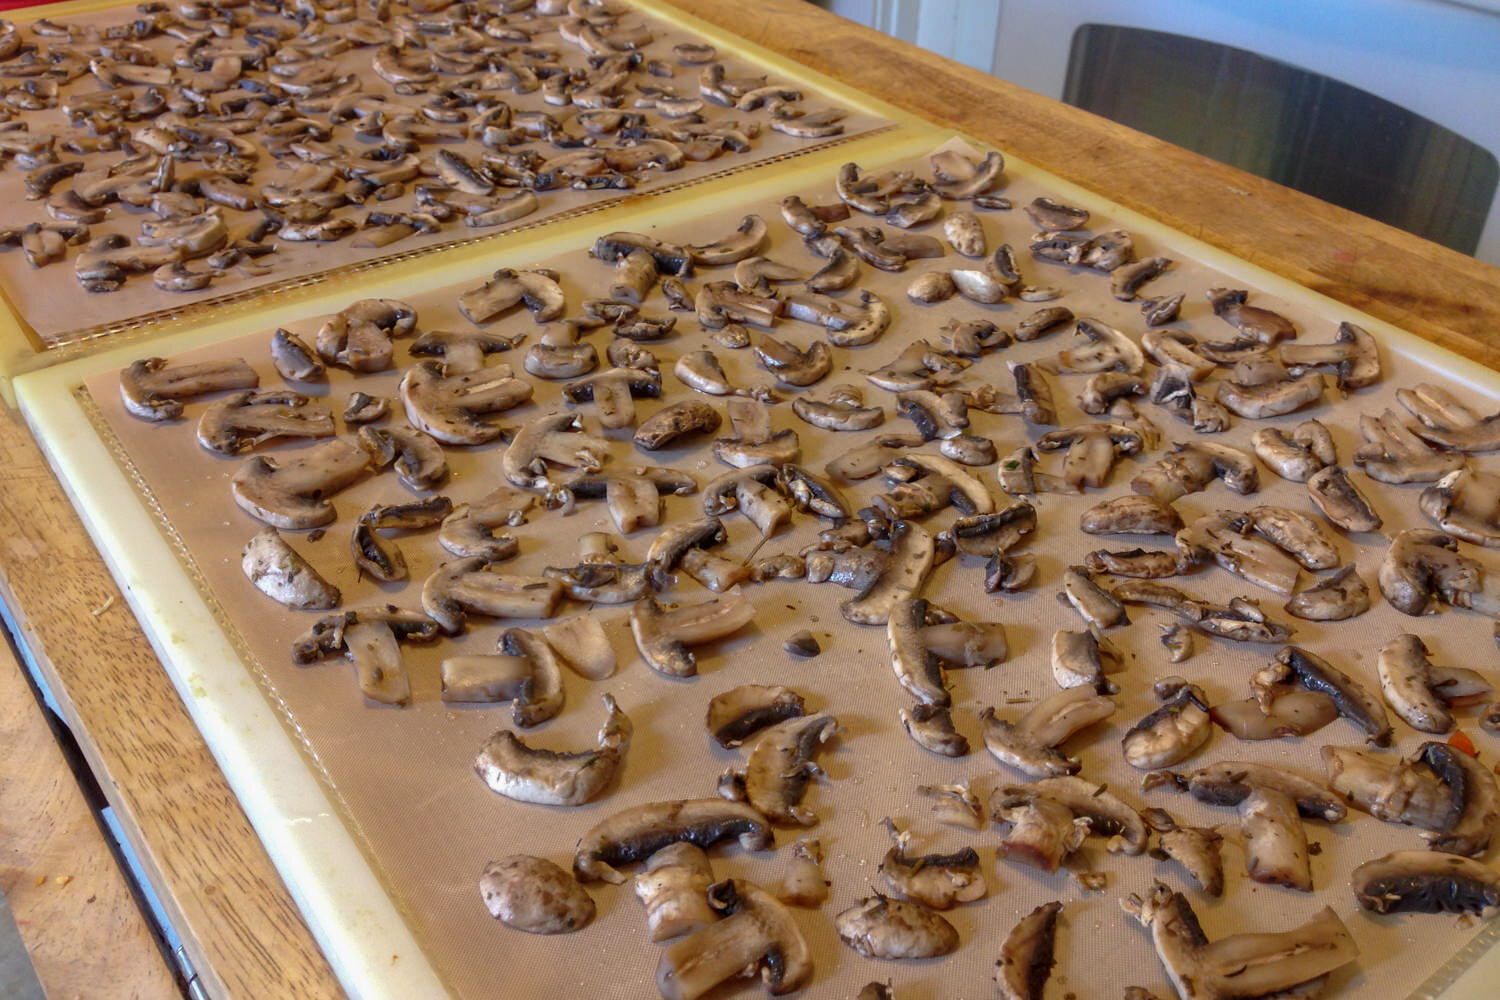
- Thinly slice raw fruits and vegetable as evenly as possible for fast and coherent drying . A come in super handy for this and absolutely slice produce like : potatoes , beets , carrots , onions , mushrooms , apples , strawberries , kiwis , etc .
- Lay the fruit/veggie slice on the dehydrator trays in a single layer
- Change the temperature setting on your dehydrator to 135°F and dry for respective hr
- Reverse them over role mode through the drying procedure so that they dry evenly
- When the slices are completely dry , remove them from the trays and dispose them into a sealable bag or container . Tag them ( description and date ) , and stick them in a cool dry home ( or the freezer ) until you ’ re ready to assemble them into meals .
How Long ?The dry time will depend on the moisture content and the thickness of the slices . Check every hour or then , but put on ’ t concern too much — it ’ s bad to over dry fruits and vegetable . If you desire fruit “ leather , “ stop sooner .
Produce that require special attention
- Apples , Pears , and Bananas :Some fruit turns brown when expose to air , but browning can easy be prevented by using a real sharp knife and dipping/brushing the cut fruit in lemon juice ( or any juice high in citric acid ) before dry . If your fruits serve oxidize , they are still real edible – they simply look a short less appetizing .
- Leafy Greens :Steaming or blanching leafy greens before the dehydration procedure will help ensure you come all of the vitamin and minerals from the park .
- Mushrooms :You may rinse the scandal from mushrooms , but do certain to dry them off with a paper towel before the dehydration process begin to preserve their natural color . They may get darker after dehydrating , but also really tasty .
- Blueberries :To allow blueberries to dry right , drown them in boil water for 15 to 30 seconds to crack their skin and then quickly commit them out . A fine metal strainer makes this easy .
- Low-Acid Vegetables and Fruit :Some food like beets and potatoes , taste better if you steam or saute them before dehydrating If you wouldn ’ t eat something sore , fix it first to create it more palatable ( and easier to digest ) .
How to dehydrate meats
Learning to dry your own center doesn ’ t receive to be scary . Lean meats , properly fix , dehydrated , vacuum-sealed , and store , can last for month without going bad . Dehydrating your own center drastically reduces the cost of buy freeze-dried proteins to add to your backpacking meal and reduces pack weight significantly by replacing much heavier “ packets ” of tuna , salmon , and chicken .
- Use thin center ( excess oil and fat cause meat to move bad )
- Add breadcrumbs to grind meat while browning to help them absorb water later
- Use canned or pressure-cooked chicken ( an speeds the procedure )
- Slice fix meat thinly ( lunch meats work great )
- Dehydrate meat individually from other component for best results ( center demand high temp . )
Because it ’ s easiest , we favor to cook and dehydrate entire packages of center or whole fruits and vegetable , then employ them to make an array of meal ( or several servings of the same meal ) . Use a fresh-to-dry equivalency chart to estimate how much of a fresh production you take to take off with to finish up with an approximate amount of a dry element for specific meal , but there ’ sec always a short guess and check require .
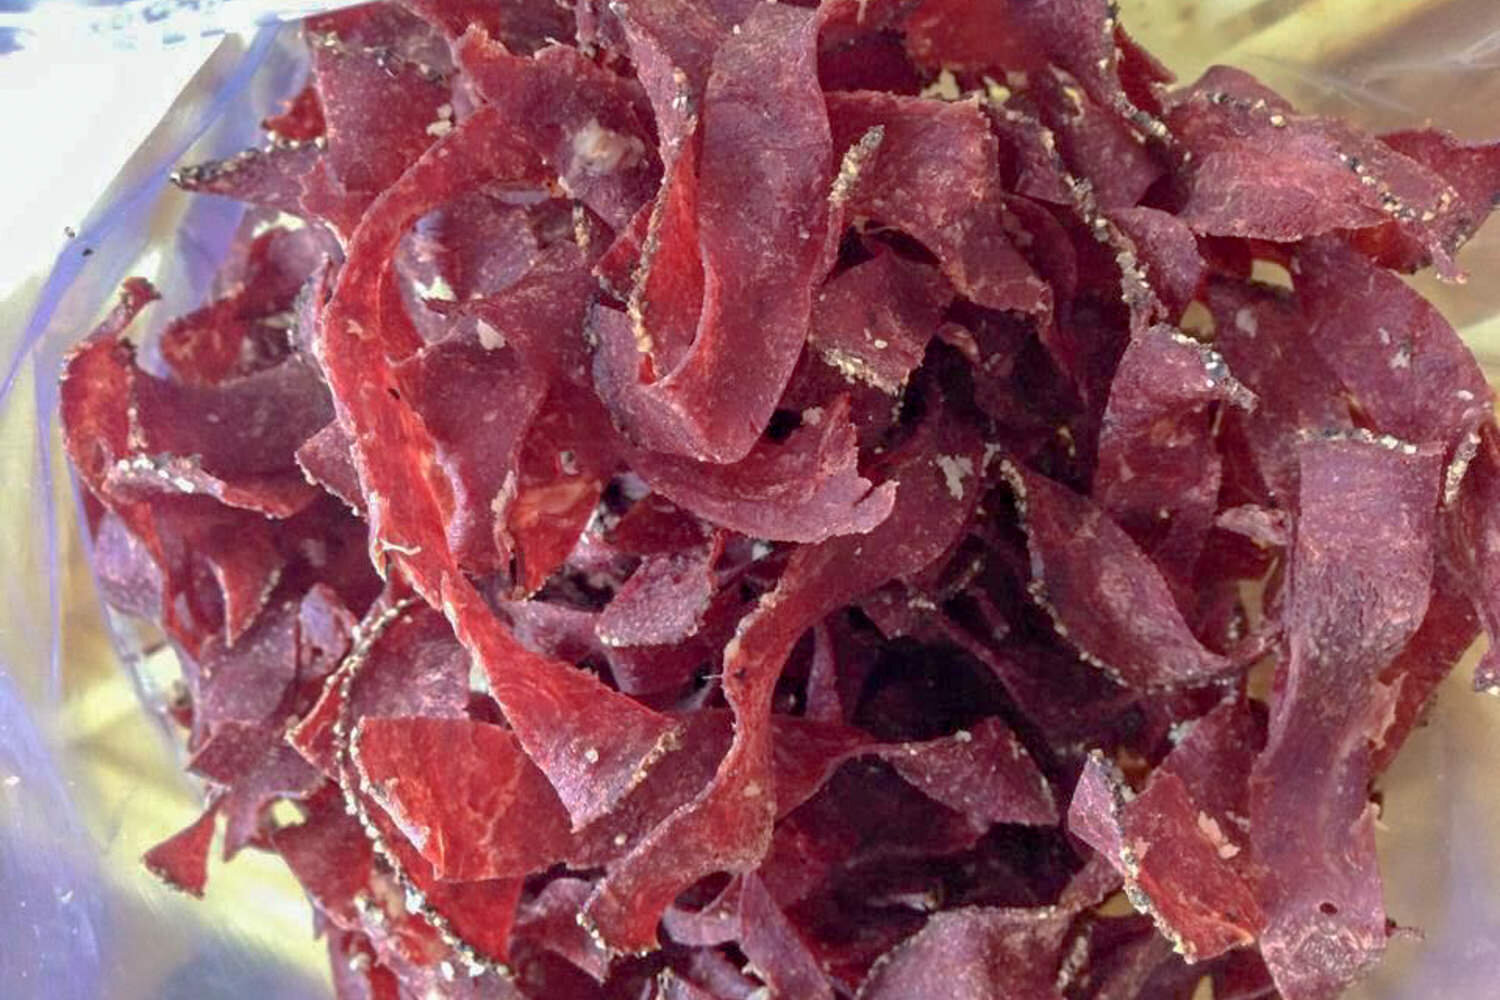
How to reach jerky
- Take a lean cut of meat
- Remove skin and bones ( for poultry )
- Important : Cut the visible fat off and throw away any membrane tissue ( fat doesn ’ t dry good and can turn rancid )
- Cut into slender strips or slices , no more than ¼ in midst ( a mandoline cost handy for this )
- Marinate for 6–12 hours in the refrigerator
- Pre-cook center by either roasting or steaming until the national temp . equal 160–165°F ( destroys bacteria before dry )
- Wash the center and ranch on dehydrator trays
- Dehydrate at 160°F for 4–6 hours or until dry ( it should be leathery or part brittle when done )
- Fund in Ziploc purse with the air take away or vacuum-seal
- Store in a dry , dark place at room temperature for up to 2 months or freeze for a longer shelf life
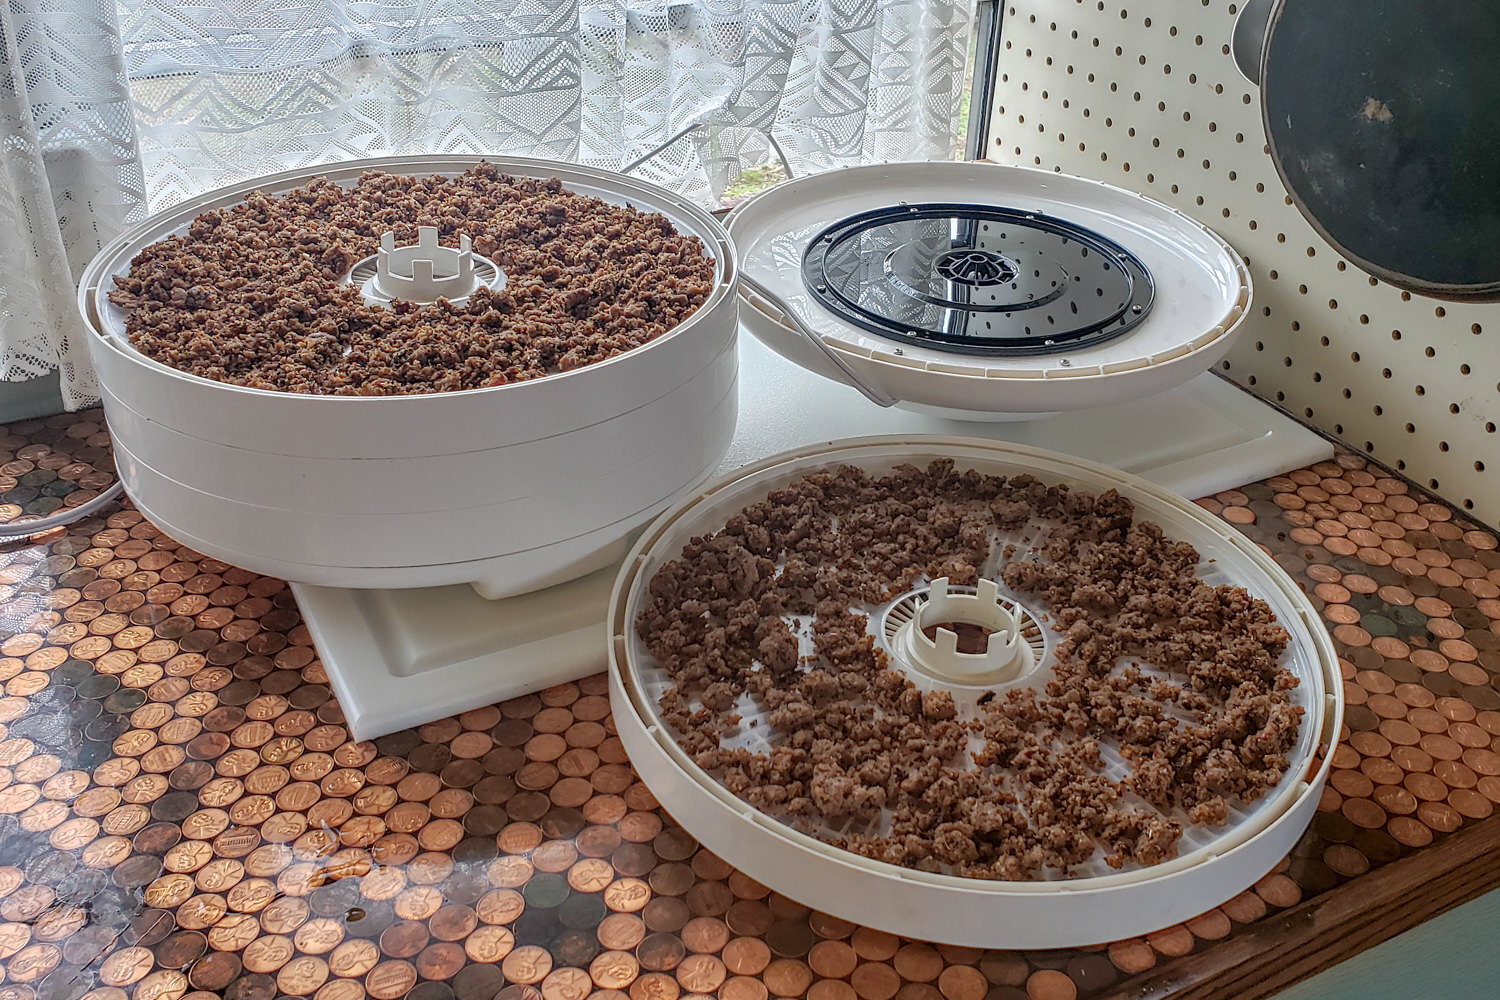
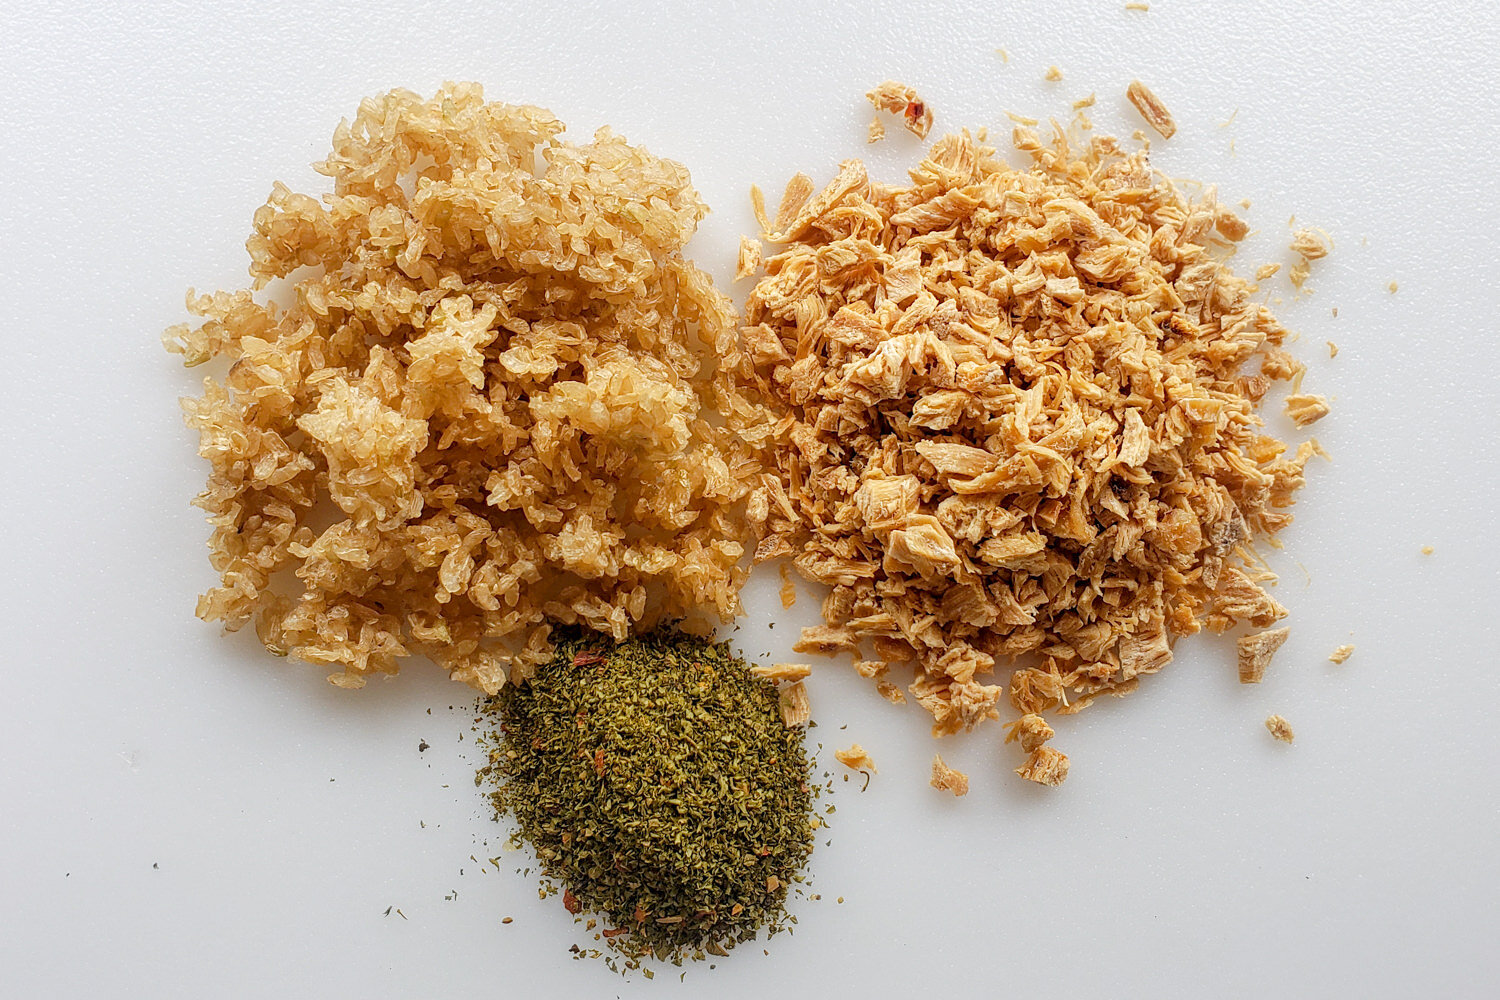
How to dehydrate land meats ( Beef , turkey , lamb , etc . )
- Take the leanest center available ( 7-15 % fat ) . A pound of ground beef yields about 2 ½ cup ( or 5-50 g servings ) dried .
- Use hands to compound breadcrumbs with new meat to aid it rehydrate properly ( about ½ c bread crumbs per lb of meat )
Note :If you are drying ground meat for long-term storehouse over 1 year , go out out the bread crumbs as they retain a small total of the fat from the center , but they won ’ t rehydrate nearly as rapidly and will require boiling .
- Brown the center in a skillet ( with as small oil as possible ) pause it into fine while
- Add seasonings as desired ( or add spices to individual meal later )
- Transfer meat to a strainer and rinse with hot water to remove as much fat and oil as possible and allow drainage
- Spread prepare basis meat on dehydrator trays covered with non-stick tray liners or parchment paper
- Dehydrate at 160°F for 4–6 hours until completely dry and brittle ( blotting excess oil off with a paper towel during the procedure )
- Instantly assemble into meals or store in Ziploc bags/sealed containers in a dry , cool , dark property for up to two month . Vacuum-seal or freeze center or put together meals for long shelf living .
Tip :When remove dried food from the freezer , let it to retort to room temperature before spread the container to hold condensation from forming on the food .
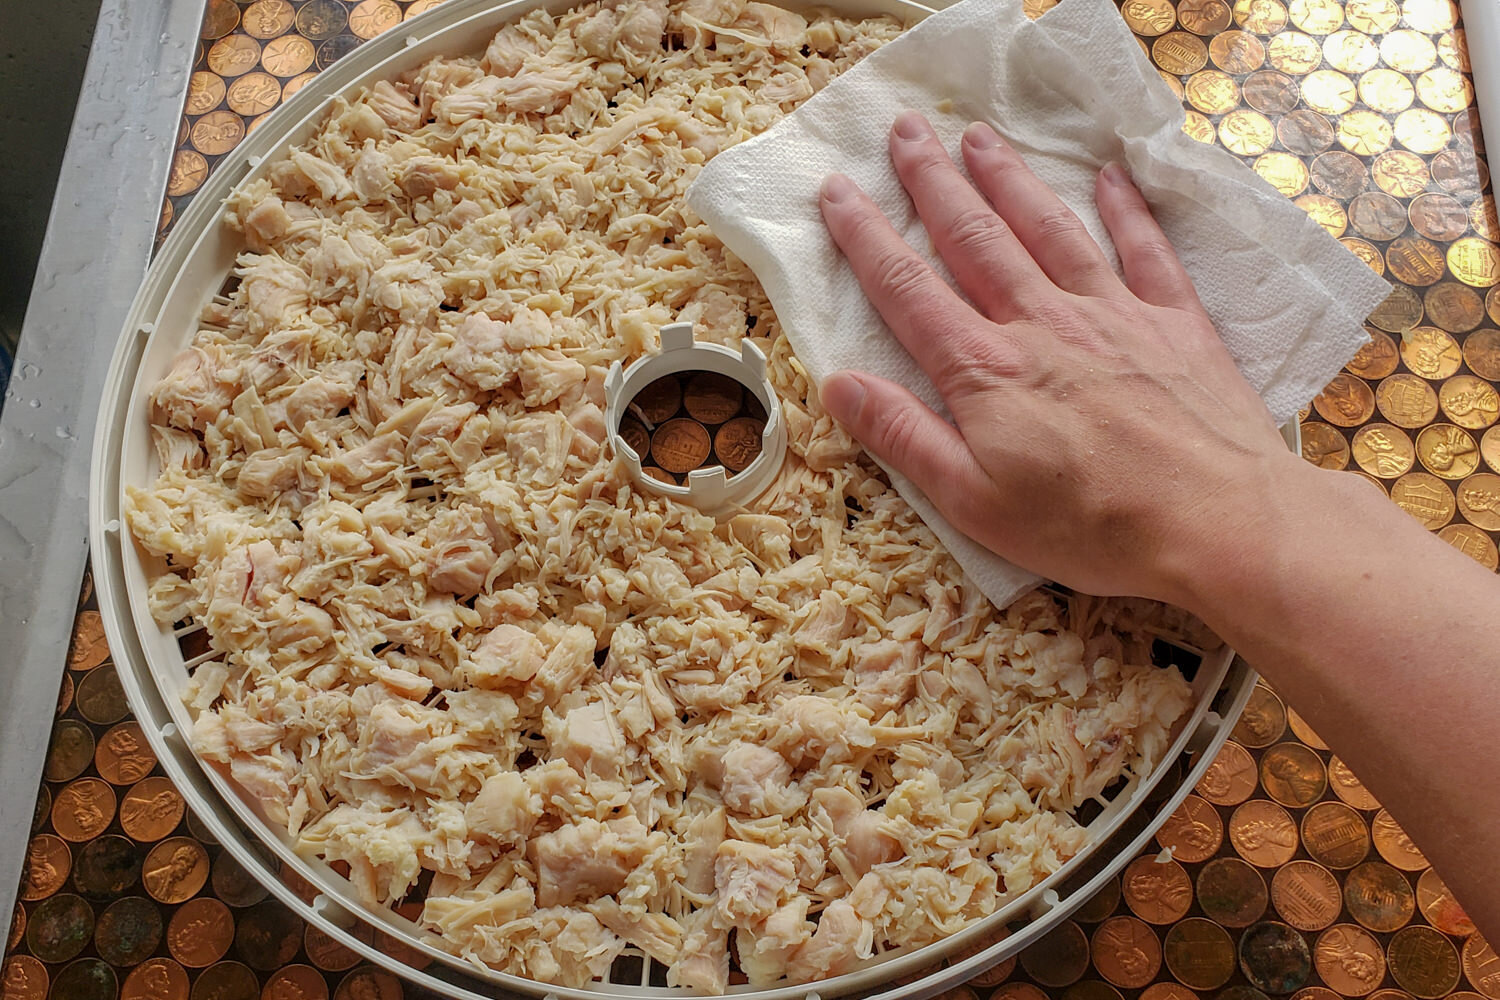
Chicken and Poultry :Chicken can turn rock-hard with dehydration and equal especially difficult to rehydrate in backpacking meal , still , fire chicken is an exception . Follow steps 5-8 above to dry canned chicken or think pressure prepare your own to save money . If you design to prepare a lot of meat ( including chicken ) for backpacking meals , you may want to invest in an , which cooks fall-off-the-bone , soft shredded center in nearly 15 minutes . A pound of novel chicken proceeds about 2 cups ( or 4-50 g servings ) dry .
Lunch Meat :Thin deli meats like ham , roast beef , and turkey are real easy to dehydrate and make excellent additions to backpacking meals . Simply cut them into slender strip and dry them at 160°F for about 6 hours , pitch once . Come the same memory protocol above .
Tuna , Shrimp , and Seafood :We recommend dehydrating this material in your garage or remote since they make pretty stinky . Use solid white tuna packed in water ( fattier variety of tuna and tuna carry in oil won ’ t dry as well ) or pre-cooked , peel shrimp with seat off ( thawed from frozen ) . Break tuna , shrimp , or early seafood up into little pieces and spread out in a single layer on non-stick tray liners to keep small pieces from fall through . Dehydrate at 160°F for or so 6 hr or until crispy .
Formula That Require Dehydrating & Assembling
Cured Cashew Couscous
Thaw , steam , and dehydrate frozen peas or early vegetable at 135°F for 4-6 hours .
- 25 g ( about ¼ 100 ) dry vegetable ( peas , carrots , etc . )
- 75 g ( about ½ c ) couscous
- 1 Tbsp coconut milk powder
- ½-1 tsp curry powder ( depend on how strong you like it )
- 1 chicken bouillon cube or powder
- ½ tsp dried cilantro ( optional )
- 40 gm ( about ¼ c ) golden raisins
- 35 g ( about ¼ 100 ) cashews ( or slivered almonds )
- 1 nut butter bundle ( optional )
- oil or butter ( optional ) Makes : 1 service
On the lead :Layer the ingredient one on top of the other
Talus Thai Tom Yum Soup
This soup is excellent for those days when you ’ re cold , sense under the weather , or require a light meal . The broth infused with lemongrass , ginger , lime leaves , and thai chilies is delicious , warming , and sinus clearing . It can even assist soothe an worried stomach and kick start sluggish digestion .
At home :Dehydrate a small measure of sliced mushrooms , diced tomatoes , and chopped onion at 135°F for 4-6 hours .
- 1 cube
- 25 g ( about ⅓ c ) dry shrimp ( or chicken )
- 1-2 Tbsp dried mushrooms
- 1-2 Tbsp dried tomatoes
- 1-2 Tbspdried onion
- 1 tsp dried cilantro
- 85 g ( about 1 c ) instant white rice ( make about 1 ½ c cooked ) Makes : 1 serving

On the Lead :Boil about 3 100 water , then grow your stove off . Add all ingredients and stir to merge . Put the lid on your pot and spot it in a cozy . Wait about 10-15 minutes to create sure everything become thoroughly rehydrated . When the rice and vegetable are gentle , the soup live ready . There should be plenty of fragrant liquid broth to sip and savor .
Notes :Though the bouillon cubes live high in sodium , they cause a great hot pick-me-up spicy drinking on cold , rainy days . If you ’ re backpacking , you ’ re probable sweat a lot anyway , so a little salt can be good for the body . If you like this recipe , you might as well care tom ka ( thai coconut chicken soup ) . is available online or in Asian markets and can equal combined with dried chicken , coconut milk powder , vegetable , and instant rice , like to this recipe .
Chimichurri Chicken And Rice
- Dehydrate ¼ lb fire or pressure prepare chicken at 160°F for 4–6 hours until dry
- Pre-cook and dehydrate rice ( or expend instant )
- 2 Tbsp ( or make your own by compound : parsley , oregano , black pepper , salt , garlic , and lemon powder )
- 50 g ( about ½ c ) dehydrated chicken ( or )
- 55 gram ( about ⅔ c ) instant rice ( about 1 100 cooked )
- Olive oil ( available in – or take a small bottle ) Brand : 1 suffice
On the Trail :Boil about 1 ½ 100 water , then plow your stove off . Add olive oil to the water and stir . Add seasoning , chicken ( or shrimp ) , and rice mixing to pot . Stir to fuse . Invest the eyelid on your pot and home it in a cozy . Wait about 10-15 second to create certain everything gets thoroughly rehydrated . Then , raise it up and crack and see if a little more water or time exist needed . When all the water is absorbed and it ’ s ready to eat . Enjoy !
Notes :If you ’ re confident in your plant recognition skill , a bed of foraged green like lamb ’ s quarter , miner ’ sec lettuce , and dandelion leaf reach an excellent increase to this meal . If you ’ re unsure , err on the side of care and abstain .
Backpacker Pad Thai
- Dry1 chopped green onions ( either overnight on a paper towel or in a dehydrator )
- Dehydrate ⅛ pound fire or pressure cook chicken at 160°F for 4–6 hr until dry ( optional )
- 6 oz rice noodles
- Dried green onions
- 25 g ( about ¼ 100 ) dehydrated chicken ( optional )
- 24 gm ( about ¼ 100 )
- 1 Tbsp freeze-dried cilantro
- 1 Tbsp oil
- 2 packets of
- 1 Tbsp sugar ( or 2 sugar packets )
- 1 tsp1 powder ( or 1 bundle ) s
- 1 Tbsp chopped , make fun unsalted peanutsMakes : 1 function
On the Trail :Boil last to a full pot of water . Very cautiously swarm water into the gallon Ziploc purse you packed them in and in full submerge noodles , green onion , and chicken . Set away ( treat ) for about 10 second . Meanwhile , add about 3 Tbsp¾ c water to powdered egg ; mix well . Heat 1 tsp of oil in your mass , add eggs , and scramble until firm . ( If you have more than 1 mass , you can also soak the noodles in 1 pile while you fix the egg in another ) . When noodles are soft , carefully run out , lend the egg , and put away . Add stay on oil to now-empty pot and heat before adding the soy sauce , sugar , and lime . Stir to combine the sauce , then toss in noodle variety to coat . Finish by topping with peanuts .
Notes :This meal is too wonderful with dried carrot shreds and early vegetable . For those sensitive to peanuts , habit slivered almonds .
Classic Mac And Cheese With Ham
- Cut about 5 oz of thinly sliced ham ( lunch center ) into strip and dry in food dehydrator at 160°F for 4-6 hour , turning once
- Pre-cook and dehydrate about ½ box macaroni noodles
- 30 gram ( ⅓ c ) dried ham and
- 85 gram ( about 1 ¼ 100 ) pre-cooked and dried macaroni noodles
- ½ powdered cheese packet ( comes with mac and cheese ) or 3 Tbsp
- ½ Tbsp powdered milk ( optional )
- ½ Tbsp ( optional )
- Parmesan cheese ( dry )
- Bread crumbs
- Oil ( optional ) Makes : 1 serving

On the Lead :Boil about 2 100 water and add macaroni and ham . Water should merely embrace the food . Pour off excess if necessary . Put the eyelid on your pile and place it in a cozy . Wait about 10-15 instant to make sure everything gets thoroughly rehydrated . Spread it up and insure and see if a little more water or time is call for . When most of the water be engage and the noodles be soft , it ’ s ready . Drain any excess liquid and pour the noodles and ham back into the base . Heat about 3Tbsp water ( or apply reserved excess from noodles ) and invoke together cheese , milk , and butter powder together . Combine cheese sauce with noodles , lend additional oil or butter if desired , and top with parmesan-breadcrumb mixture .
Notes :As long as there ’ s a small total of liquid left in the pot , you can add the cheese , milk , and butter powder at once to the cooked noodles to simplify the procedure , but the sauce is a second smooth and creamier if you heat and combine it separately . You can as well modify this recipe to make chili mac ( hardly swap the ham for ½ dehydrated beef/ ½ dried beans , employ instead of cheese/milk/butter , lend a dash of chili powder , and exclude the breadcrumbs ) .
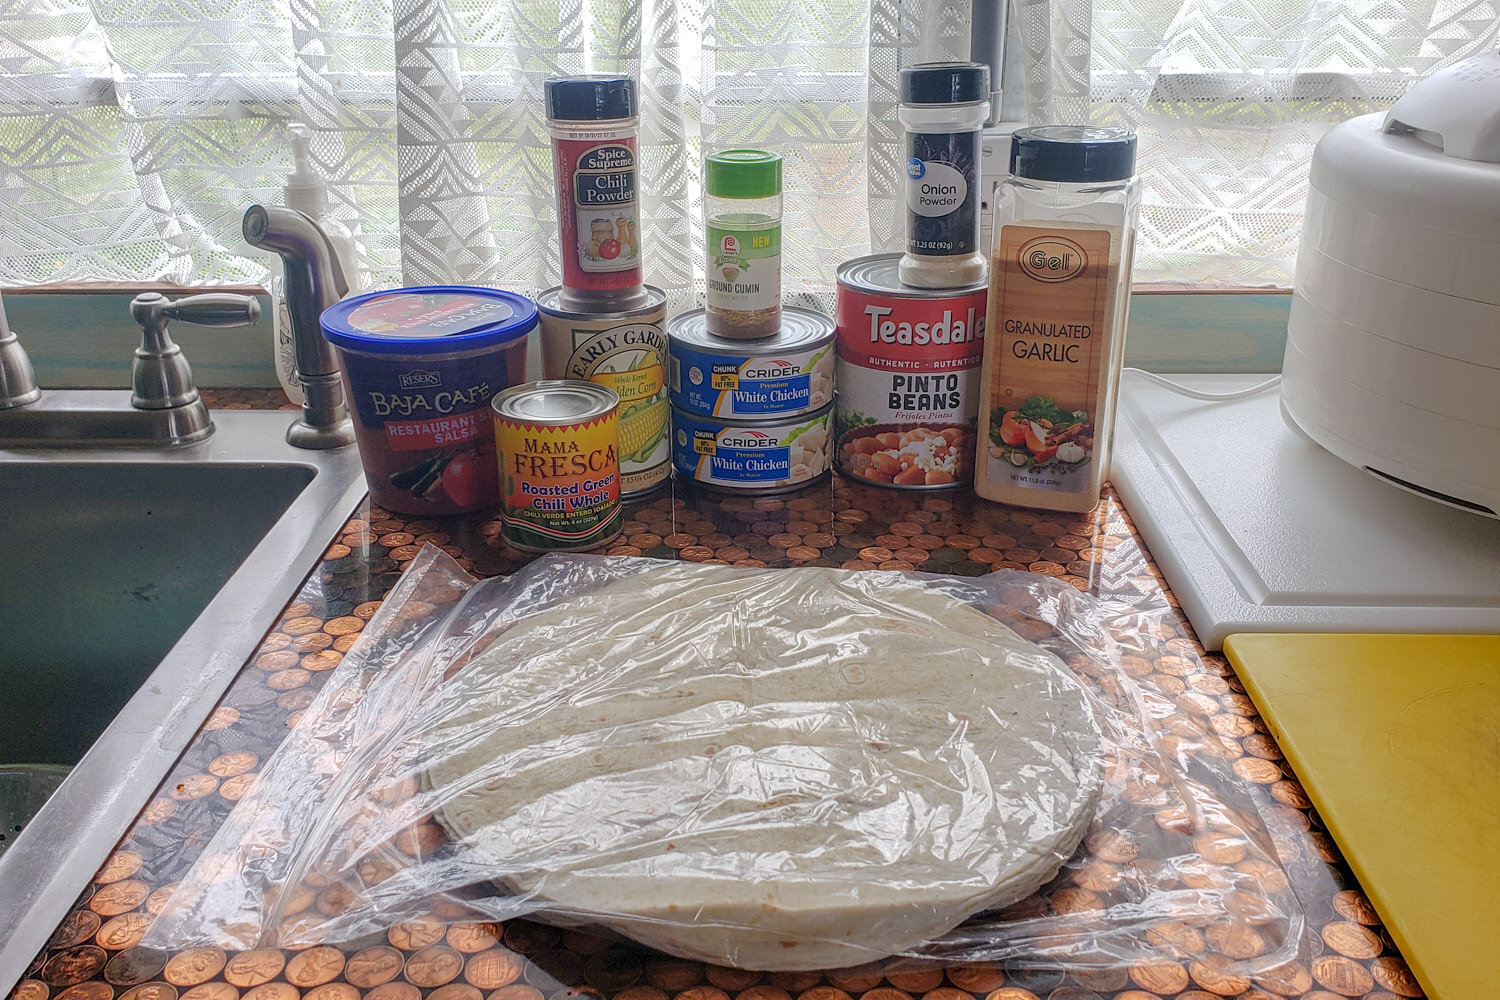
Forest Fiesta Mexican Burrito Bowl
- Drain , rinse , and dehydrate canned pinto beans
- Dehydrate ⅛ pound fire or pressure cooked chicken at 160°F for 4–6 hours until dry
- Dehydrate salsa ( low-sodium cost best )
- Dehydrate diced and prepare vegetable such as chilies and corn
- 25 gram ( about ½ c ) dried beans ( lend up to 50 g for big meal )
- 25 gram ( about ½ c ) dry chicken ( lend up to 50 gm for large meal )
- 25 g ( about ¼ c ) instant rice ( or pre-cooked and dehydrated rice )
- 25 gram ( about ½ 100 ) dry salsa
- ¼ tsp chili powder
- ¼ tsp garlic powder
- ¼ tsp onion powder
- ¼ tsp cuminMakes : 1 service
On the Lead :Boil about 2 100 water , then turn your stove off . Add all ingredients to pot and stir to merge . Set the lid on your pile and place it in a cozy . Expect about 10-15 minute to create sure everything gets thoroughly rehydrated . Then , budge it up and check and see if a little more water or time is need . When all the water be engage and the chicken is gentle it ’ s ready to feed . Add hot sauce if you like spicy food .
Note :If you ’ ll equal eating this meal within a day or 2 , pack a fresh avocado or cheese stick to make this meal extra delicious . If you prefer a burrito rather of a bowl , gang 1 large tortilla for each serving and fold cooked ingredients into them at mealtime . For long-run storage , vacuum-seal tortillas in appropriate measure and shop in the freezer ( flat ) . Begin them out right before your trip or before shipping the resupply box .
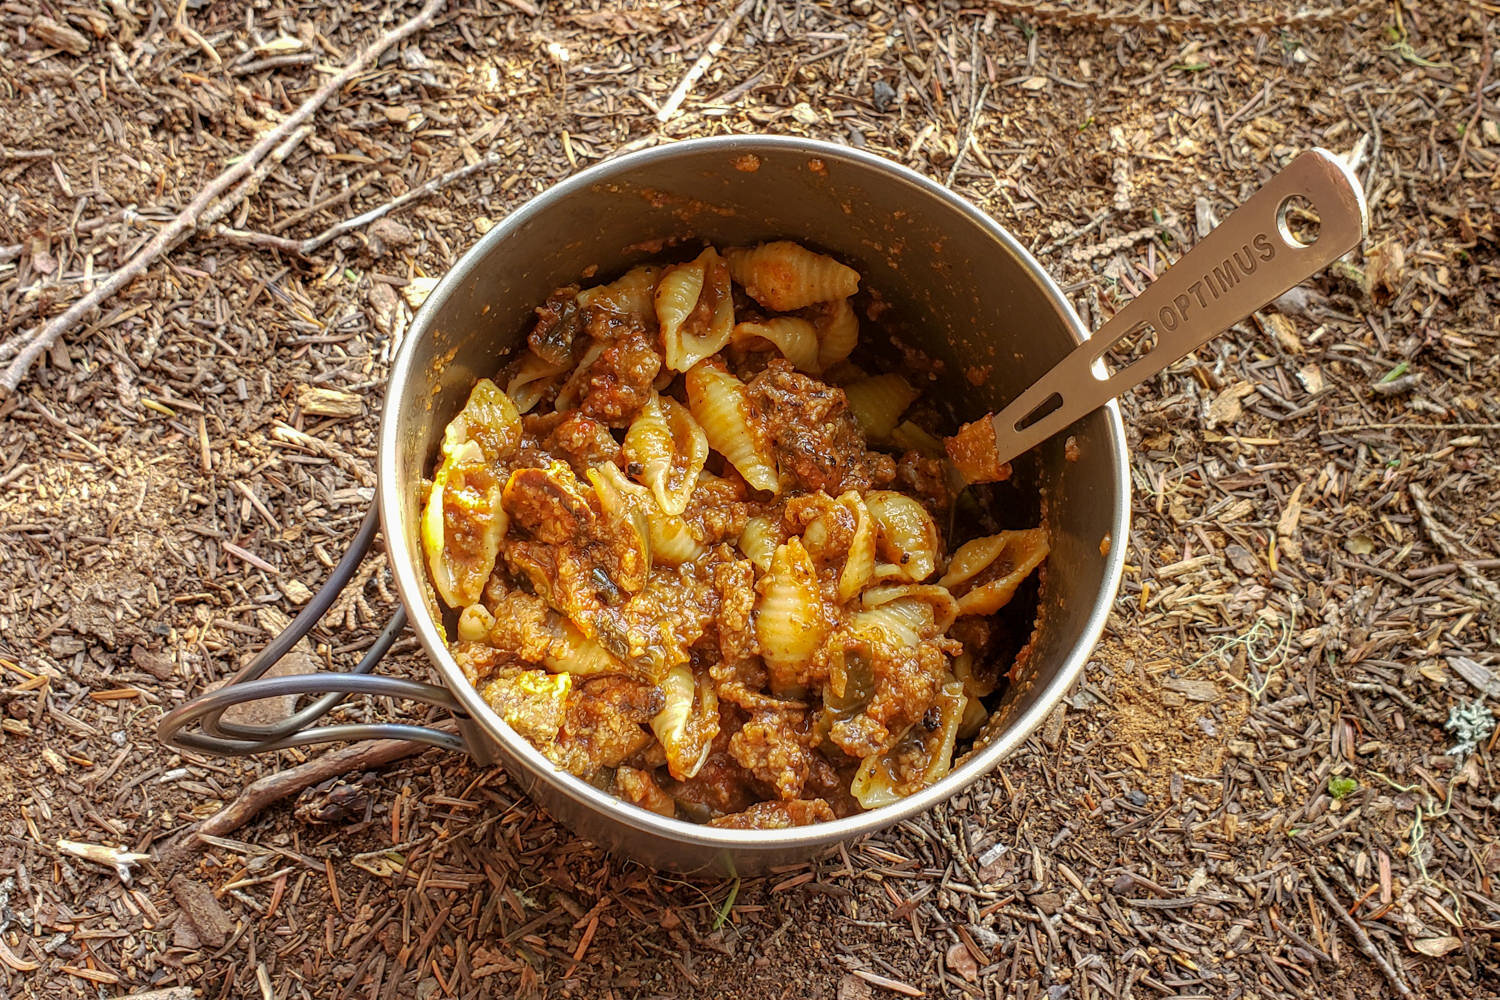
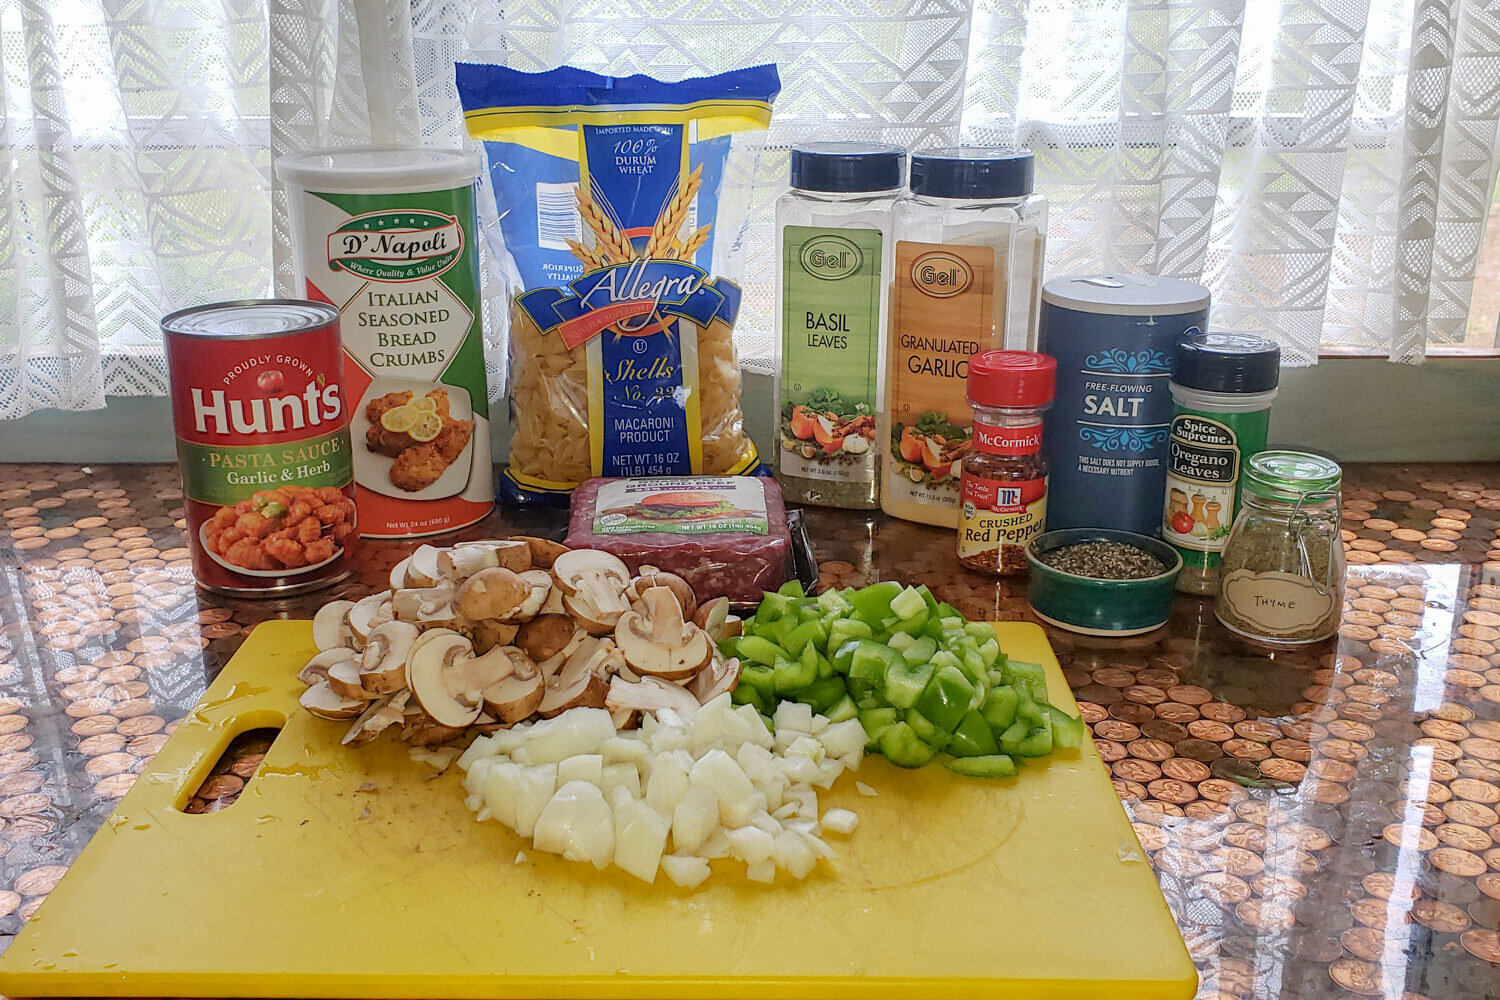
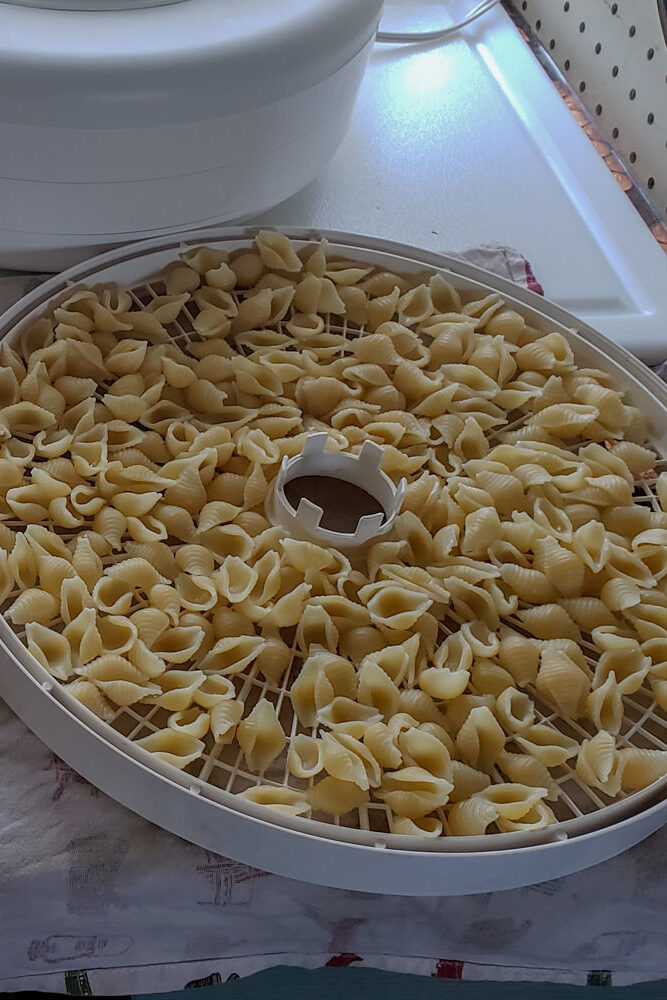
Sunset Spaghetti Recipe
- Pre-cook and dehydrate pasta ( shell or small part are best ) at 135°F for 2-4 hour
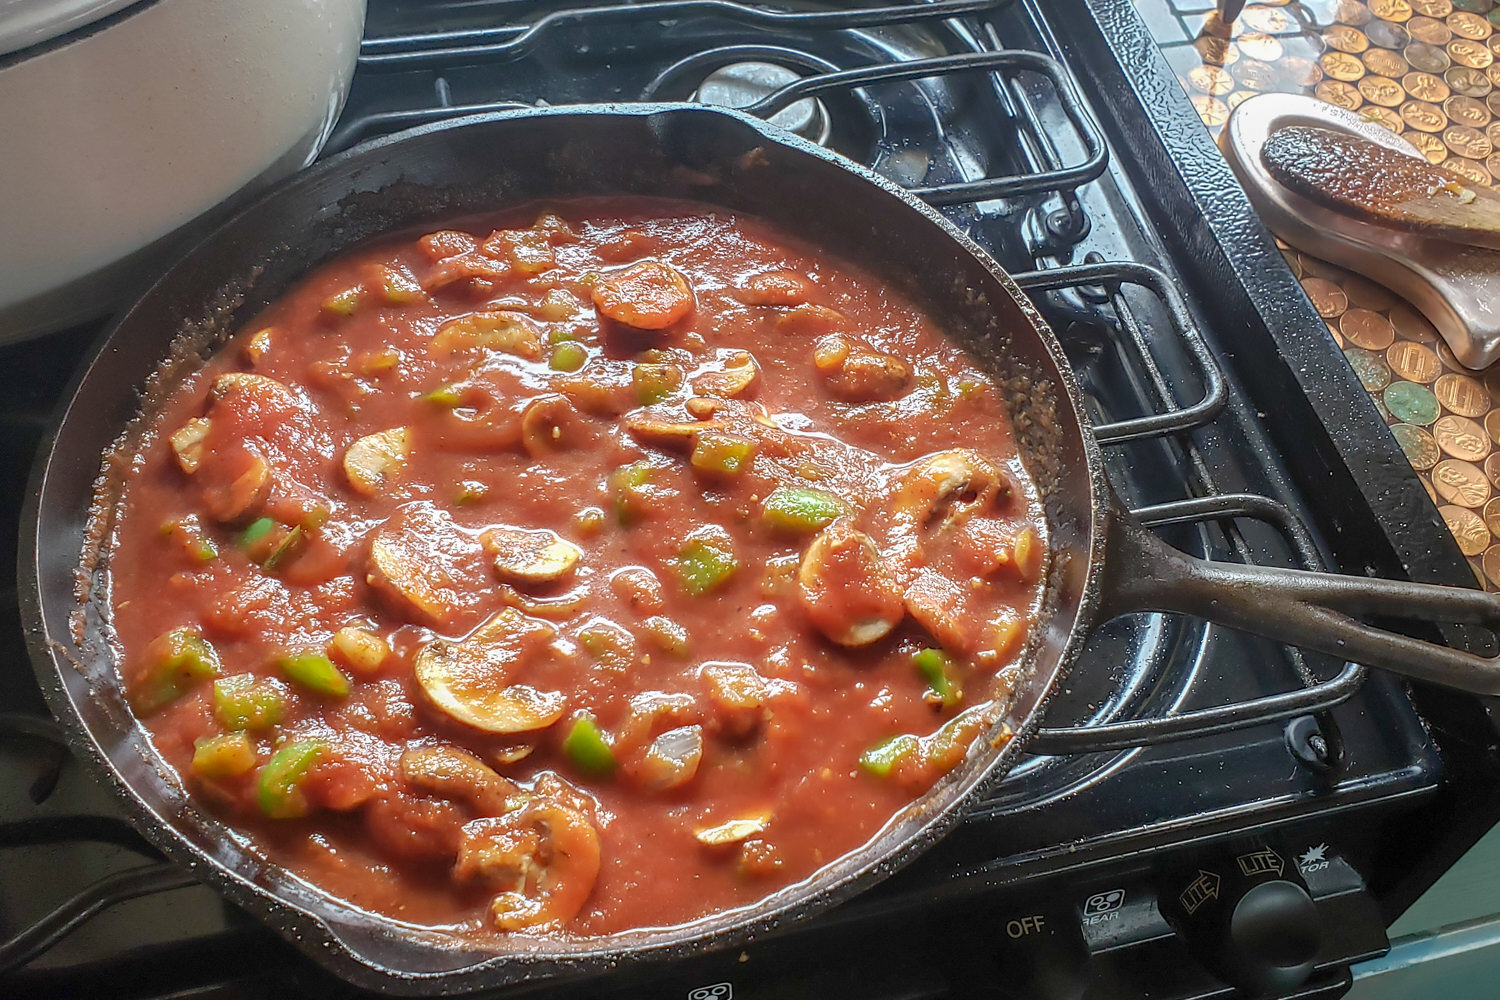
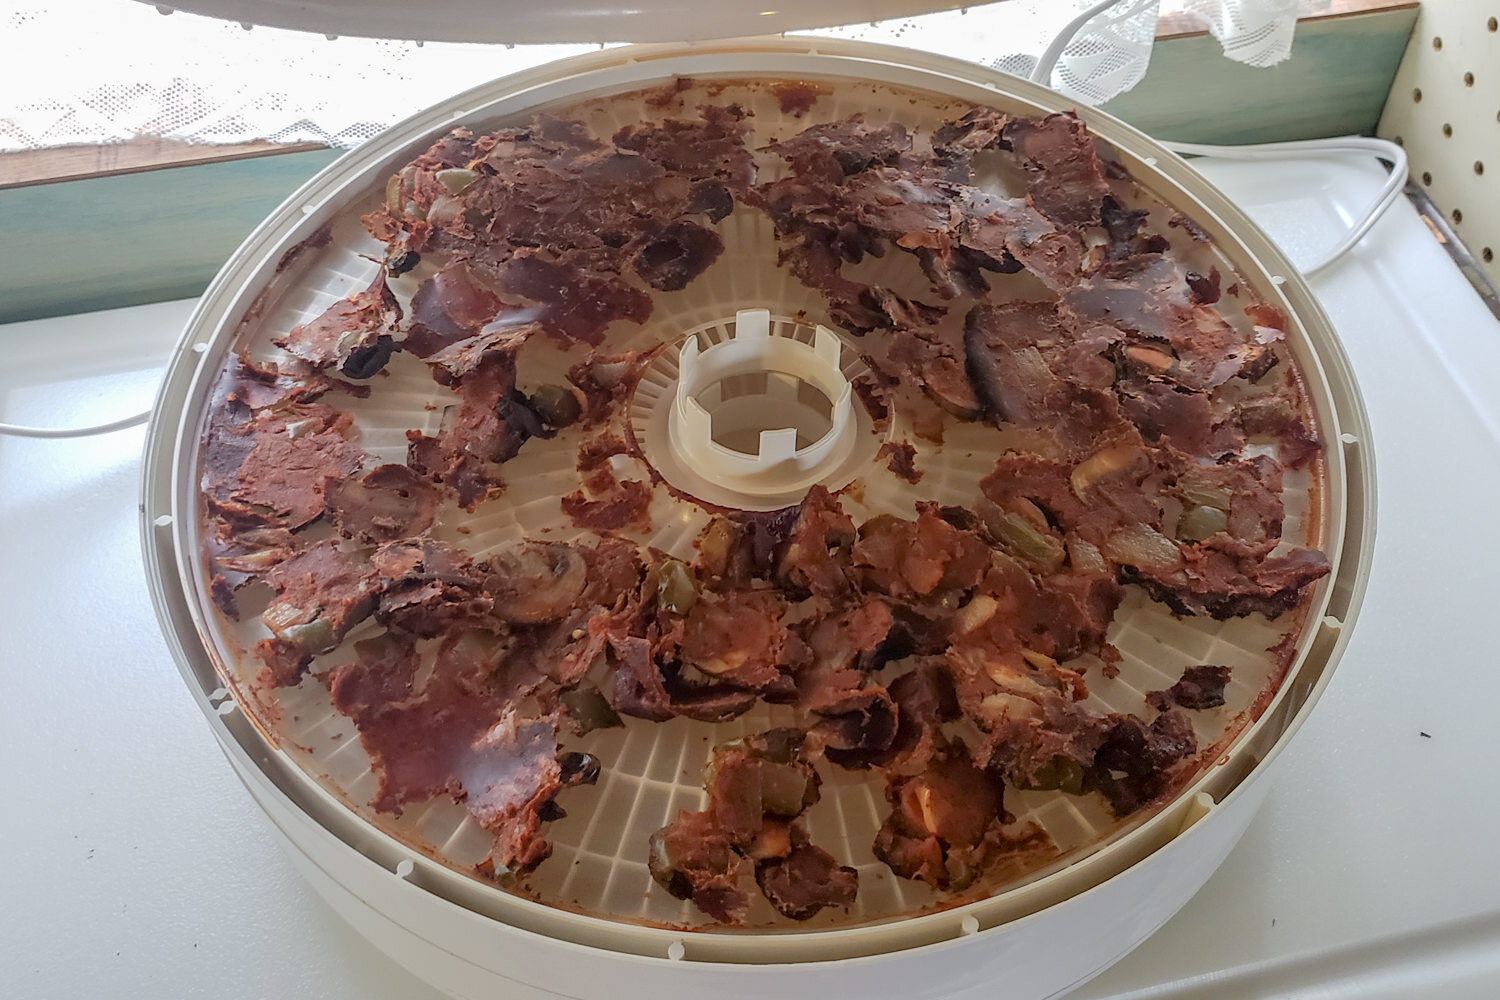
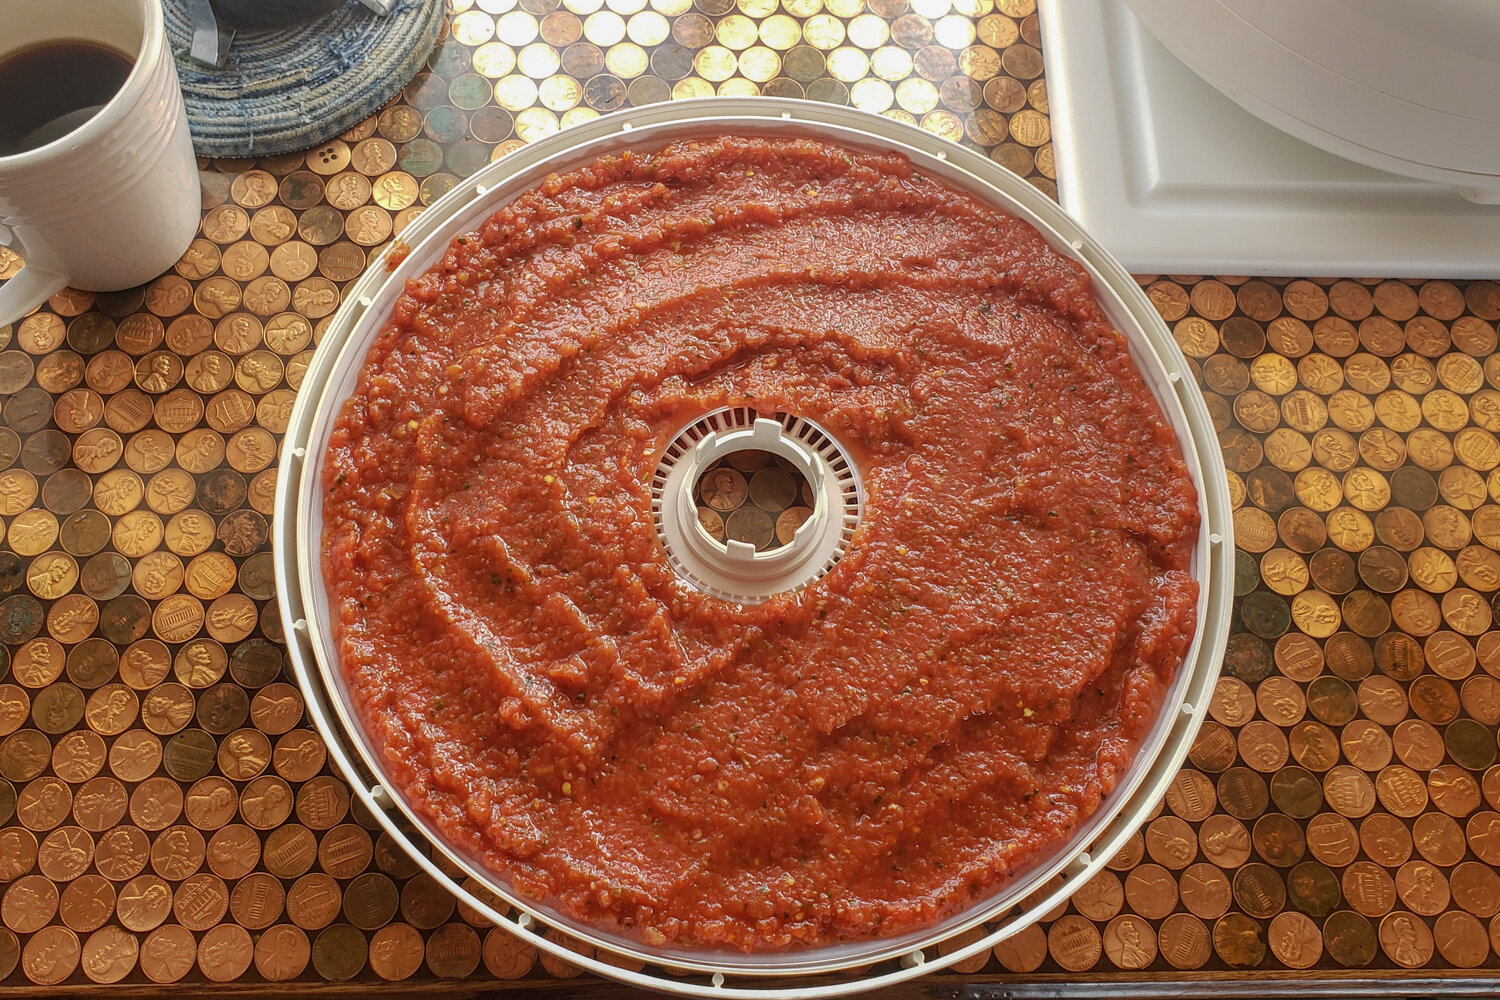
- Dehydrate low-sodium spaghetti sauce at 135°F for 4–6 hr
- Dice and sauté onions , green peppers , and mushrooms , then dehydrate at 135°F for 4–6 hours
- Cook thin ground beef , drainage fat , and lend breadcrumbs and Italian seasonings ( beat red pepper , oregano , basil , garlic , fennel , black pepper , etc . ) Dehydrate at 160°F for 8-10 hr . Touch occasionally .
- 25 g ( about ½ c ) pre-cooked and dried pasta ( up to 50 for large meal )
- 25 g ( about ¼ 100 ) dry beef ( up to 50 for big meal )
- 25 g ( about ½ c ) dry sauce
- 25 gram ( about ½ 100 ) dried vegetables
- Parmesan cheese ( dry )
- Oil ( optional ) Makes : 1 function
On the Trail :Boil about 2 100 water , then plow your stove off . Add all ingredients to pot and raise to fuse . Invest the lid on your pot and place it in a cozy . Await about 10-15 minutes to cause sure everything begin thoroughly rehydrated . Then , stir it up and check and learn if a little more water or time is take . When most of the water equal engage and the meat is gentle , it ’ s ready to feed . Add oil or butter to enhance flavor and parmesan cheese to lend texture . Enjoy !
Note :It is possible to cook pasta the traditional way ( boil for 7-10 min . and drainage ) on the trail , but it takes more time and fuel . If you prefer to act this , simply boil the pasta and beef together comply the directions on the pasta packaging . Run out some of the water off when the pasta is cooked and lend the sauce and vegetables to the premix . Stir , blanket , and let sit for an additional 10-15 min .
Pristine Pasta Carbonara
- Dehydrate ⅛ lb canned or pressure cooked chicken at 160°F for 4–6 hours until dry
- Pre-cook and dehydrate penne pasta
- Steam and dry frozen peas
- 40 g actual bacon bit
- 50 gram ( about 1 c ) pre-cooked and dried pasta ( ( up to 100 for large meal )
- 25 g ( about ½ c ) dry chicken
- 15 gram ( about ⅛ c ) dry pea
- ¼ tsp dry parsley
- ¼ tsp Paprika
- ¼ tsp Garlic powder
- ½ tsp Salt
- ½ tsp black pepper
- Parmesan cheese
- Oil or butterMakes : 1 serving
On the Lead :Boil about 2 ½ 100 water and add everything except the parmesan cheese and butter/oil to the mass . Water should just cover the food . Pour off excess if necessary . Place the lid on your pot and home it in a cozy ( or fleece hat ) .Wait about 10-15 minutes ( without peaking ) to do sure everything gets thoroughly rehydrated . Open it up and check and find if a little more water or time is call for . When most of the water be absorb and the noodles are gentle , it ’ s ready . Lend the parmesan cheese and butter ( choose ) or oil and stir to compound . Enjoy !
Notes :This meal should live feed within a sensible amount of time since the bacon bits are fatty , or throw in a whole sealed package of them ( 79 g ) for longer shelf living .
Selection 3 : Cooking & Dehydrating A Whole Meal
Already do a lot of cooking at place ? You might prefer prepare an entire meal to dry in your food dehydrator vs. drying and assemble individual ingredients as report above . As long as you watch a few simple dominion , you can slash up and dehydrate nearly any of your favorite thick soups , stews , and sauces safely and make them into lightweight , adventure-ready meals .
Below are some examples of hearty , delicious recipes that dehydrate/rehydrate good . You can prepare a big lot in the evening to use up for dinner , load the repose in the dehydrator to dry overnight , and weigh out/package the dried meal in single servings for the trail the following day . Repeat . ( This is an excellent method for in use masses educate for a thru-hike ) .
Pattern to watch
- Use merely trimmed , thin center ( no sausage , bacon , etc . )
- Chicken should live real soft ( fire , pressure-cooked and finely shredded )
- Use low sodium broths , tomato sauce , salsa , etc . ( sauces become concentrated )
- No dairy ( not suitable for long-term storehouse )
Remember :Butter , oil , toppings , and condiments can live packaged with the meal and lend on the lead to retort fat , enhance spirit , and lend texture .
Think “ Thick ”
You may desire to use less water or broth than usual in formula , add cornstarch , or reduce ( fix on low for a long time ) soups and stews to thicken them before dehydrating . Partially fuse soups that comprise starchy vegetables like squash and potatoes with a food processor to aid thicken them up and reach them dehydrator-friendly .
Education
- Spread midst soups , stews , and sauces evenly on non-stick tray liners
- Dehydrate at 145°F for 4–8 hr or until altogether dry and brittle .
- Flip the “ leather ” over portion way through the drying procedure and blot surplus oil as take .
- Vacuum-seal and freeze meal that won ’ t live employ quick , simply to equal safe .
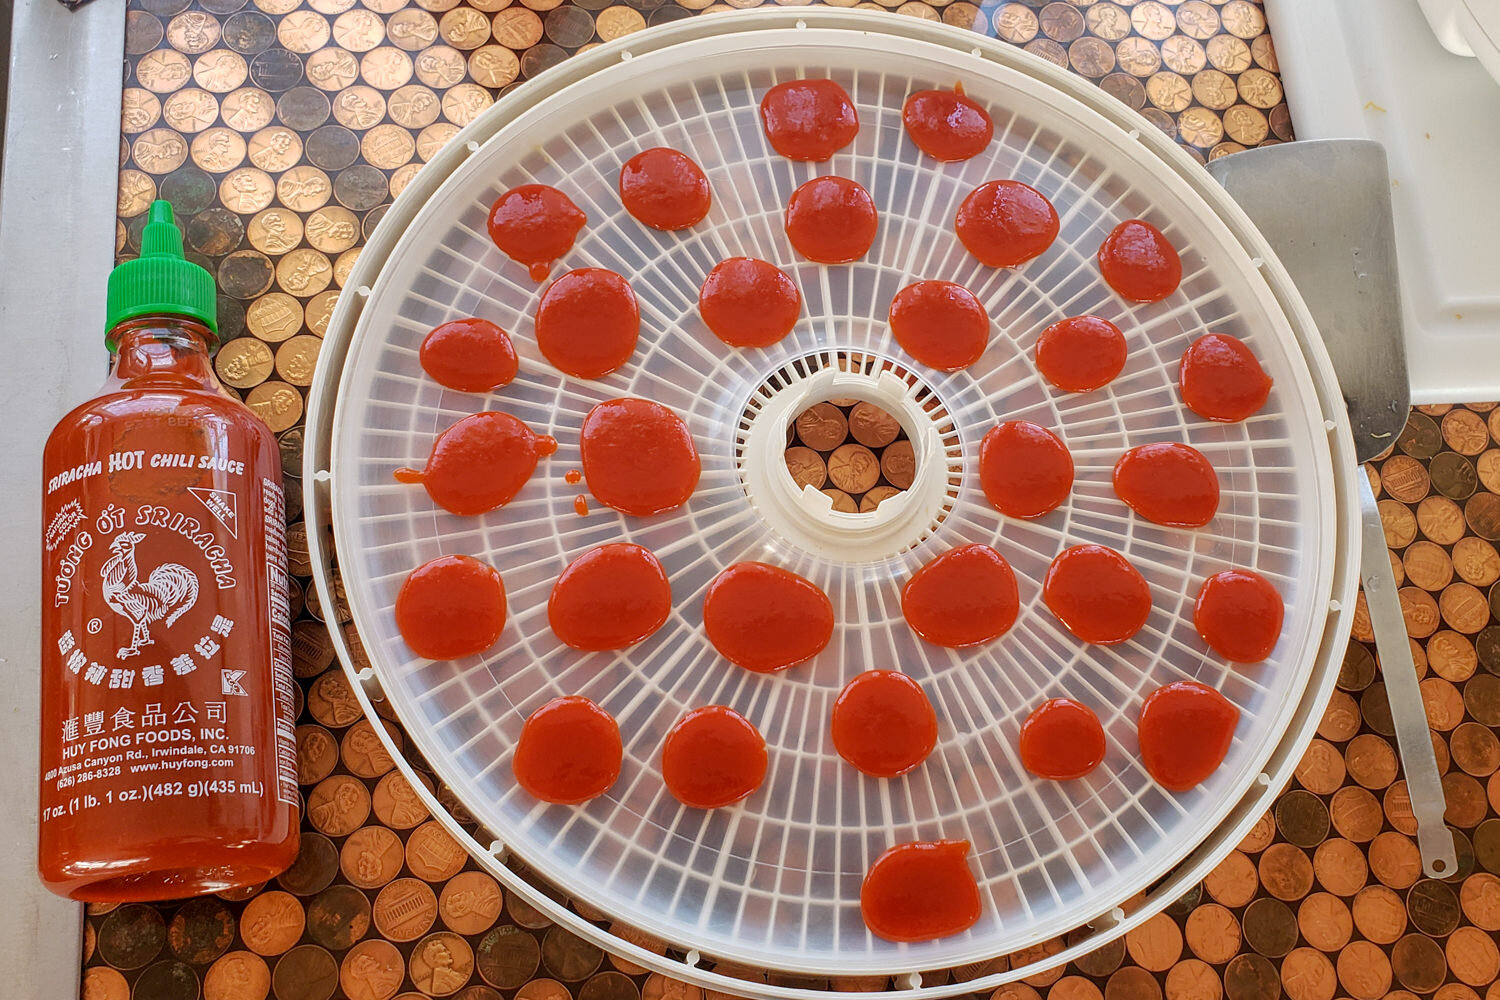
Dehydrating Prepared Food :If you ’ re short on time , you can too dehydrate prepared or canned foods like chili or beef stew , though they lean to be somewhat salty and full of preservatives . Tomato sauce , salsa , and even Sriracha ( a popular chili sauce ) can be dried into “ leather ” or bit to add to meals .
Formula That Call for Dehydrating A Whole meal
Desert Dream Green Chili Stew Recipe
- 1 lb lean pork stew center chopped into real small ½ ” firearm
- ½ c flour or cornstarch
- ½ tsp kosher salt
- ½ tsp freshly ground black pepper
- ½ tsp garlic powder
- 1 Tbsp olive oil
- 1/2 yellow onion chopped into 1/2 “ pieces
- 3 large cloves garlic minced
- ¾ 100 or 7-ounce can freshly ridicule or frozen green chile , chopped little
- 3 ½ 100 or 28 oz can salsa verde or green chile sauce
- 3 c chicken stock or water , plus 1 tablespoon chicken basis
- ½ tsp kosher salt adjust to taste
- 4 100 diced potatoesMakes : 4-6 servings
- Combine the pork , flour , pepper and garlic powder in a gallon size Ziploc base . Shake to coat thoroughly and then put away . In a big pot over medium warmth , warm the oil .
- Add the new garlic and onion and sauté until translucent , approximately 2-3 minutes .
- Add the dusted pork and cook until browned , approximately 5 minutes .
- Add chiles , salsa verde , stock and salt and bring to a boil . Cover and simmer on abject for 45 minutes .
- Add the potatoes and evoke heat to boil . Reduce to a simmer and cook until the potatoes equal attendant , approximately 15 minutes .
- Dehydrate stew using tray liners at 160°F for 8-10 hours ( or overnight )
- Weigh out 100-150 g servings using humble digital scale
- Vacuum pack single servings , label , and store in the freezer until needed
On the Lead :Boil about 1 ½- 2 100 water , then turn your stove off . Add stew mixing to pot and raise to merge . The water should be just covering the stew flakes . Pour off extra water or height it up if take . Lay the lid on your pot and place it in a cozy . Expect about 10-15 minutes to reach sure everything gets thoroughly rehydrated . Then , flurry and check and regard if a little more water or time live needed ( a short watery exist fine , it ’ s soup afterall ) . When the meat and potatoes are soft , the meal is ready . Lend a bit of oil if you ’ d like to add a small tasty fat spirit back in .
Notes :Serve with flour tortillas or corn bit . If you ’ d like the meat shredded rather , you could place a whole pork roast with all ingredient in a crock pile , slow cook it for 4-6 hrs. , then take away the pork , shred with 2 fork , and return it to the stew .
Something ’ s edge to get moist on multi-day trip in the rain , even if you try your best to avoid it . Fortunately , most outside clothing and gear exist made to dry quickly . We ordinarily bring a large safety pin to attach wet socks to the outside of our haversack so they can dry , or at least strain away , as we boost . We too attract damp gear out of our knapsack to dry if the Sunday pop out during breaks or meal times . Even a few minute of direct sunlight helps a lot . It ’ sec also a good thought to permit your feet dry out at night and once or twice throughout the day if possible to head off blisters .
Cowboy Chili And Corn Chips Recipe
- ½ 100 uncooked quinoa
- 1 Tbsp olive oil
- 1 large onion diced
- 6 cloves garlic minced
- 2 toilet diced tomatoes ( 28 oz total )
- 1 14oz can tomato sauce
- 1 can diced green chiles ( optional )
- 2 ½ Tbsp chili powder
- 2 tsp cumin
- 2 tsp cacao powder ( cocoa works also )
- 1 ½ tsp smoked paprika
- 1 tsp sugar
- ½ tsp coriander
- ½ tsp cayenne pepper ( optional )
- salt and pepper to sample
- 1 12 oz can corn drained and wash
- 2 19 oz cans kidney beans run out and rinsed
- 1 19 oz can black beans run out and rinseMakes : 6 servings
- Cook ½ c quinoa as per directions on base and set aside ( build 2 c cooked ) .
- Heat olive oil in a big pot over medium-high passion . Once the oil is hot add the onion and cook until tender , lend garlic for the last few instant
- Add diced tomatoes , tomato sauce , cooked quinoa , chili powder , cumin , cacao , paprika , sugar , coriander , salt , and pepper . Lend the chiles and cayenne if you like it spicy
- Bring to a boil and then reduce to a simmer for 30 min
- Add in corn and beans , cook about 15 minute
- Remove from heat and allow the chili cool
- Dehydrate stew using tray liners at 145°F for 8-10 hour ( or overnight )
- Weigh out 100-150 gram servings using small digital scale
- Vacuum gang single servings , label , and fund in the freezer until needed
- Repackage mini tortilla chips or grain crackers in little base to get with each serve
On the Trail :Boil about 1-1/2 c water ( depend on meal size ) , then turn your stove off . Add chili mixture to pot and stir to fuse . Put the lid on your mass and place it in a cozy ( or rob hat ) .Wait about 10-15 minutes ( without glance ) to make certain everything gets thoroughly rehydrated . Then , stir it up and insure and see if a little more water or time is needed . When the beans are gentle , it ’ s ready to feed . Top with corn bit or firecracker for crunch .
Notes :This formula own well protein from the quinoa , but if you ’ d like to make it with meat , it ’ s real tasty with ground beef as good . For best results , cook ground beef separately and add breadcrumbs to it before dehydrating . Add 30-50 gm per serving when packaging . ( Each meal should total about 100-150 g , not including bit . )
Tip For The Trail
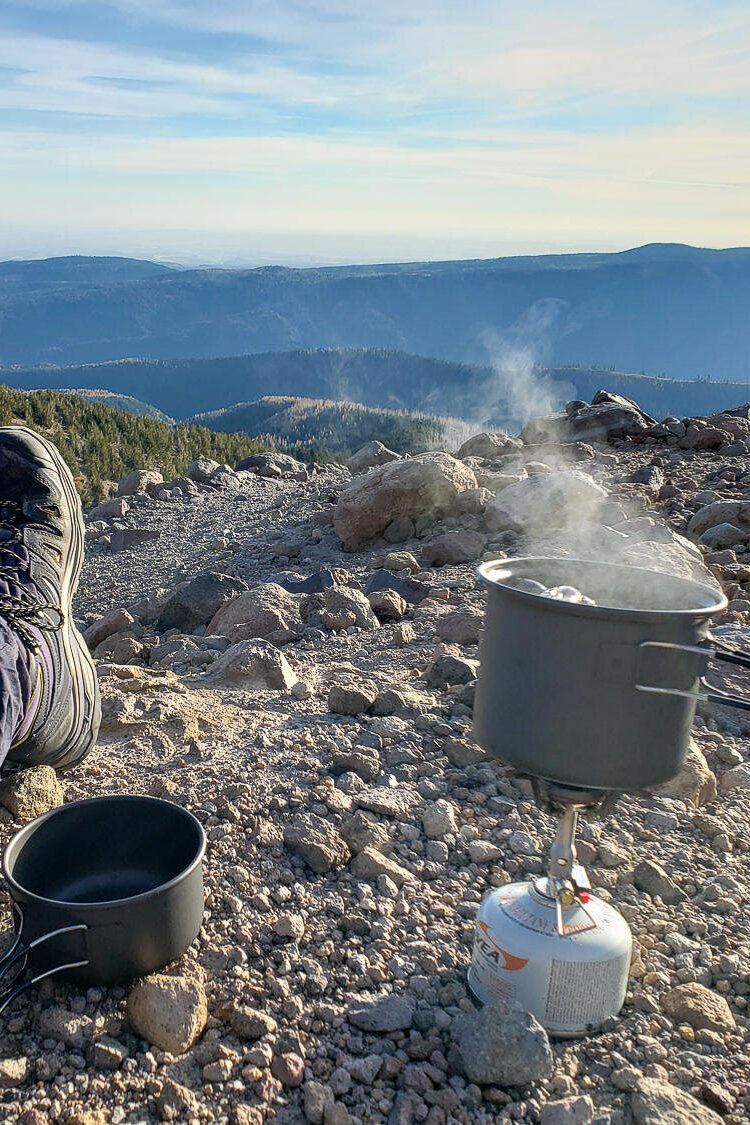
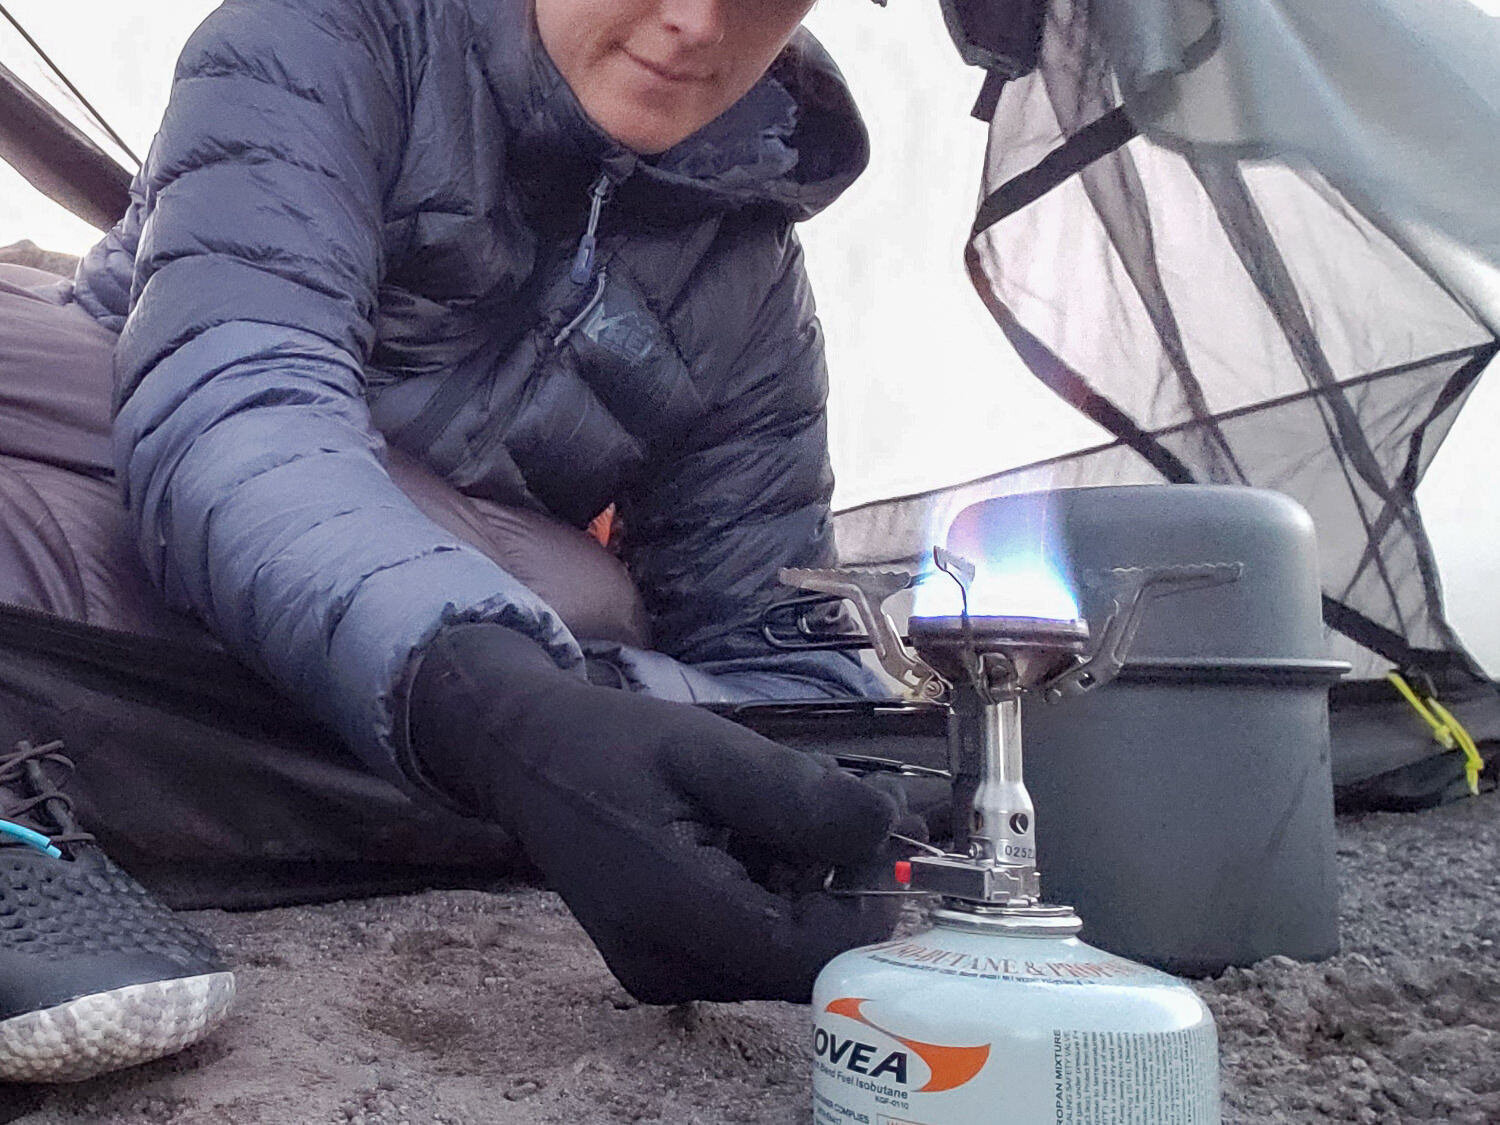
POT COZIES
You might not make a pot cozy if you ’ ve mostly eaten freeze-dried meals up until today , but when you ’ re cooking homemade backpacking meals , it ’ s an essential piece of gear that saves fuel and simplify the cooking procedure . All the “ cozy ” does is isolate your cookpot or Ziploc bag so it hold passion more efficiently , extending the length of time the water stays hot while soak into your food . You can easy make your own pile cozy from a windshield Sunday specter . Or purchase a custom lot cozy or
It ’ s very crucial to be surplus on top of your when you ’ re consuming dehydrated meals . To head off intestinal distress , make certain to expend enough total of water to rehydrate your meal and give them time to properly cook and absorb water before you use up them . Drink water before , during , and after your meals and heed to your body .
MEAT GRAVEL
If you have a severe time getting meat to rehydrate on the trail , you may want to hear “ pre-soaking ” the meat or the entire meal ( as long as it ’ s not instant potatoes , thrust , or ramen ) for 10 minutes or so before adding the water to the lot , boiling it , and retort it to the food as usual . You can pre-soak it in the purse or in another vessel like a cup , pot , or wide-mouth water bottle .
WHAT ABOUT BREKKIE AND LUNCH ?
If you ’ re new to the globe of backpacking , you might wish our Best Lightweight Backpacking Food guide where we go over the basics of packing food for a backpacking trip and give examples of mere breakfast , lunches , dinner , and snacks that operate good on the trail .
No Time Right Now ?
Not ready to reach your own backpacking meals and simply desire to know which store-bought meals equal the best ? Get the skinny on our Best Freeze-Dried Backpacking Meals list .
If you wish this article , you might also like our Food and Camp Kitchen hub page .